Adding Streaming Video to Your Website Is Easier Than You Think

Table of Contents
Video is a powerful way to transmit large amounts of information and knowledge quickly and efficiently. What may take a many pages of text to describe something or demonstrate a technique can be (at times) more clearly illustrated in a short video. It’s easier than ever to create video content get it online and share though video streaming platforms like YouTube , Vimeo or even Google Photos .
What though, if you have an existing website or blog and wish to integrate video into a webpage or blog post? This guide will show you how to take any video, transform it into a video optimized for streaming and embed it within your website.
Software Needed
For this guide, we’ll be using the excellent open source software Handbrake . Handbrake is “The open source video transcoder” and is a GUI application for manipulating and transforming many types of video.
What is Streaming Video?
Video captured on your phone, camera or through screen recording software will very often be saved as a single .mp4 video file. This single mp4 video file was created for “offline” viewing; on your phone, tablet or television - not for online streaming. Assume you have a 1 minute 1080p video, this file will likely end up around 60 MB in size. A 1 minute video shot in 4K could be over 200 MB in size. You can embed this video in a web page and it will play - but will be a suboptimal experience for your users because the video has not been optimized for streaming across the Internet.
By contrast, a video optimized for online streaming will have an overall lower bitrate (the amount of data in a frame of video), possibly downscaled from 4K to something like 1080p and have some other optimizations applied to facilitate fast and smooth video playback over the Internet. This guide will walk you through these optimizations.
How to Optimize Video for Streaming
For this guide, I’ll be using a derivative of “ Video Of Forest - Free Stock Creative Commons Video ” by Freestocks , used under CC BY-SA:
The source video above has a resolution of 3840x2160 (4K) and as you can see, the video plays just fine on this website. One major problem with this initial implementation is we’re streaming a 4K video in a video player with a resolution of 760x400. Not only are we discarding 80% of the visual data in our video player, we’re streaming almost 65 megabytes of data for this single 30 second video! Assuming your website visitors have a fast and stable internet connection this is probably fine — your video will play without issue. What though, if your visitors are on a mobile device using their cellular data, or on a home internet plan with data caps? We can do much better.
Using Handbrake to Create a Streaming Video
For this specific guide, we’ll be using Handbrake to convert our video to a format optimized for streaming on the internet. Handbrake provides a number of presets which makes this conversion quick and easy.
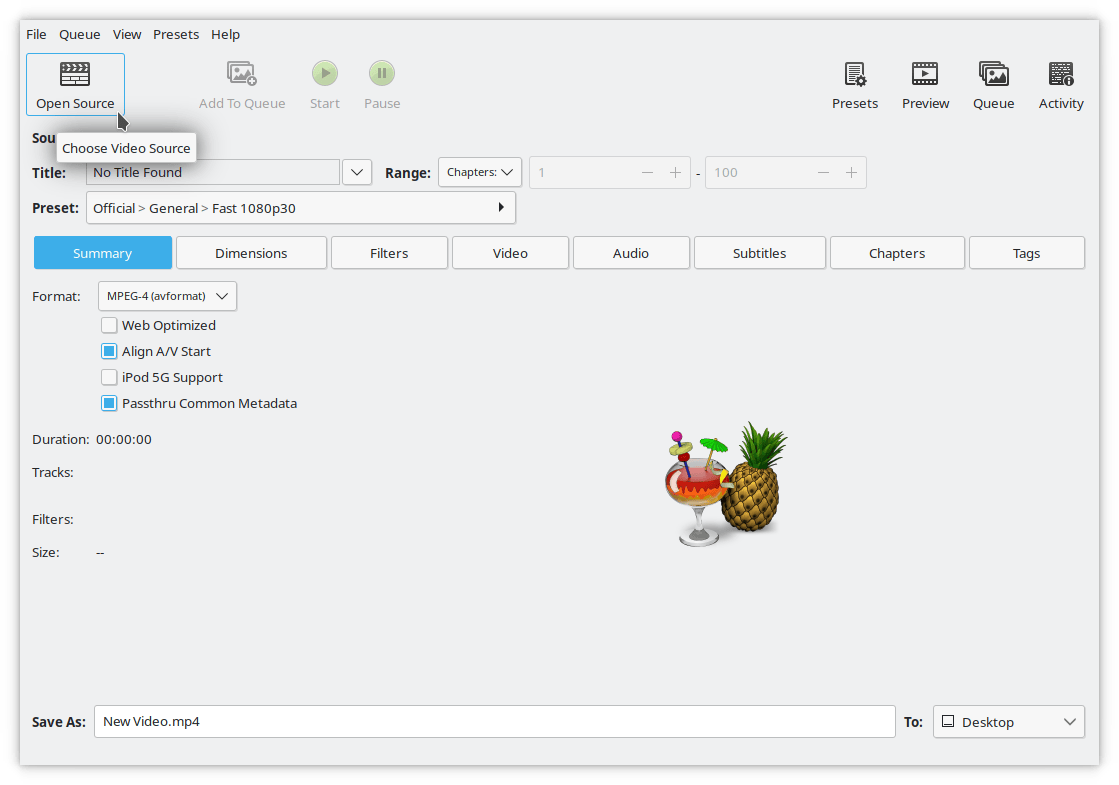
- After launching Handbrake, click on the Open Source button, and select your source video.
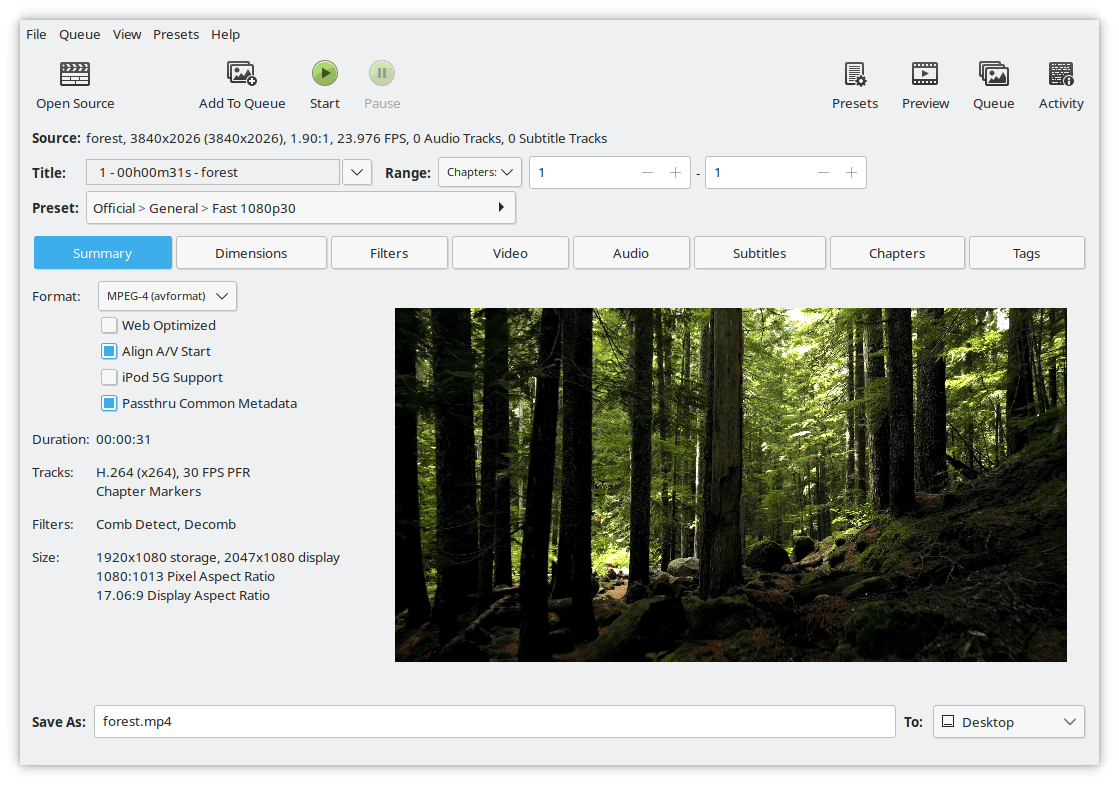
- After opening the source video, Handbrake will scan this video and display some basic statistics including resolution, aspect ratio and framerate.
- We’ll start off using a predefined preset built into Handbrake which will produce a video optimized for streaming at 1080p (HD) resolution. Click on the Preset menu, select Web and finally Discord Nitro Large 3-6 Minutes 1080p30.
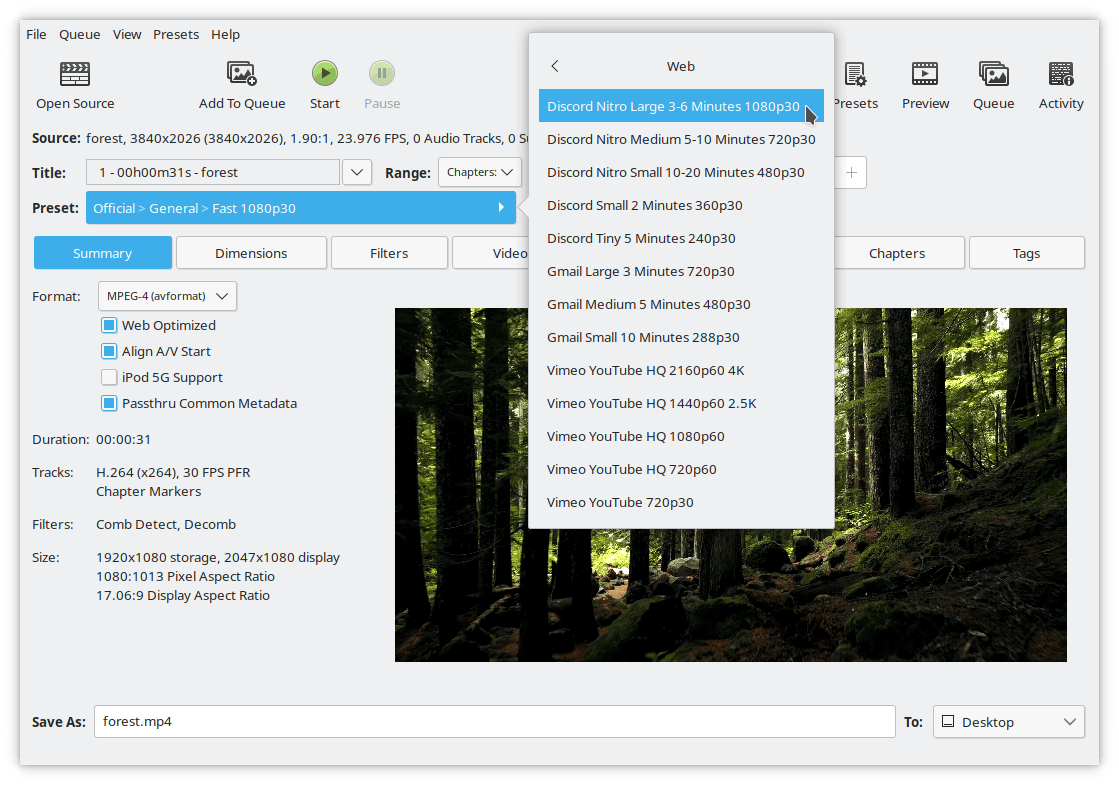
As you can see in the Preset menu, Handbrake provides a large number of presets generically optimized for a variety of output formats. In this specific example, we’ve selected the Discord Nitro preset not because we’re using our video on Discord, but because the output format is 1080p at 30 frames per second. This will provide a good balance between quality and final video size.
With this preset you’ll notice the Web Optimized option has been selected for us. This option “Optimizes the layout of the MP4 file for progressive download. This allows a player to initiate playback before downloading the entire file.” This configuration is important for the streaming use case, because we want our users to quickly start watching the video without having to wait for the entire file to download to their device, and to prevent our video player from downloading the entire file before playback.
- Finally click on the Start button which will start the encoding process. Expect that the encoding process will take some time, and the CPUs in your computer will be almost fully utilized. Encoding is a very CPU intensive task.
Re-encoding our original 4k source video using the “Discord Nitro Large” preset results in a video which is now around 9 MB in size, an 86% decrease in file size, with similar visual quality! This optimized video is below:
However, we can tweak a few settings which should result in an even smaller video file, again with little additional and ideally imperceptible loss in visual quality. Within Handbrake, click on the Video button. With the Discord Nitro preset, Handbrake is using the Constant Quality setting, which is also known as Constant Rate Factor . In short, setting the quality value to a lower value results in a larger and theoretically better quality video. Setting this quality value to a higher value results in a more compressed, smaller and lower quality video. Because we’re trying to create a video which will be used for online streaming, we need to find a balance between visual quality and size. A Constant Quality value of 17 or 18 should be considered “visually lossless”. You can adjust the Quality slider to target a higher quality video (lower number), or adjust the Quality slider to target a video with a lower file size (higher number).
Alternatively, you can select the Bitrate (kbps) option, which informs Handbrake as to the desired bitrate averaged across the entire video. This is also known as Variable Bitrate . Variable bitrate is best used when you’re trying to target a specific output file size, and output quality is less important.
The bitrate calculation is straightforward:
Final Output File Size in KB / Video Length in Seconds = Bitrate
Using the Forest video as an example, I would like a final output file size of 5 MB and the video is 31 seconds in length. I would calculate my bitrate as (converting MB to KB through multiplying * 8000):
(5 * 8000) / 31 = 1290
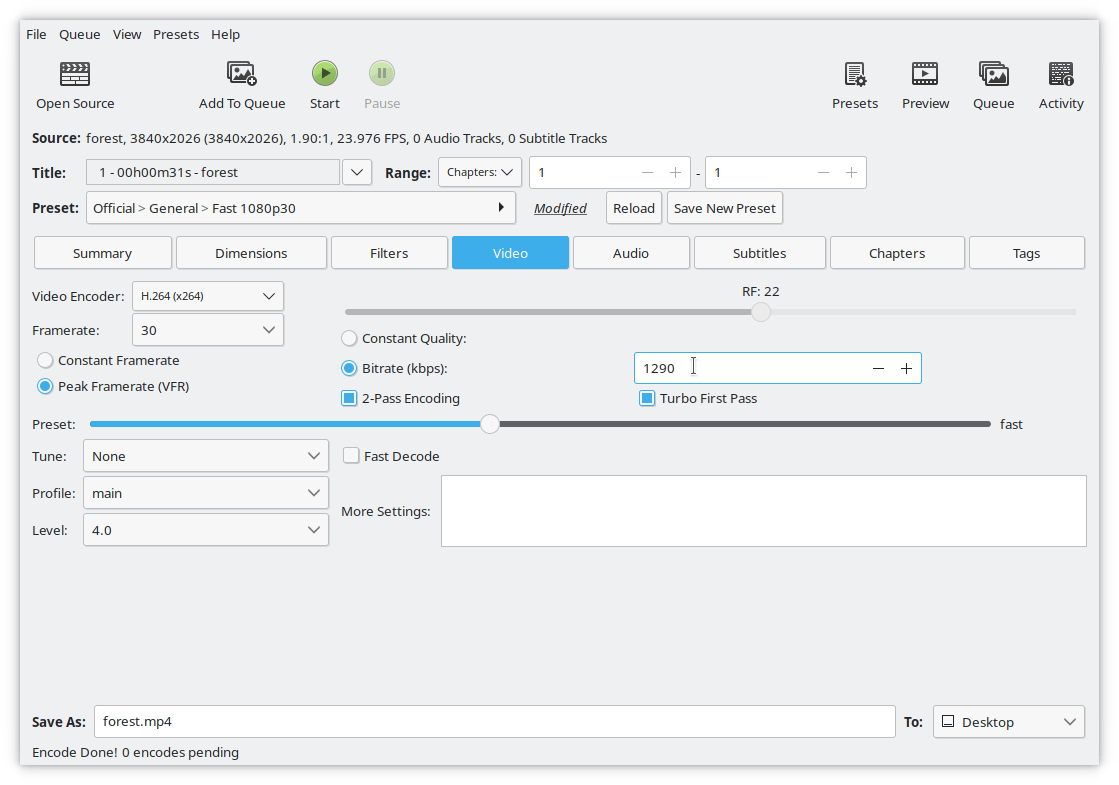
This results in a video which is 5,012 KB in size:
One of the really nice features of Handbrake is the ability to Preview what your final output video will look like. Once you’ve selected encoding settings for your video, click on the Preview button within Handbrake.
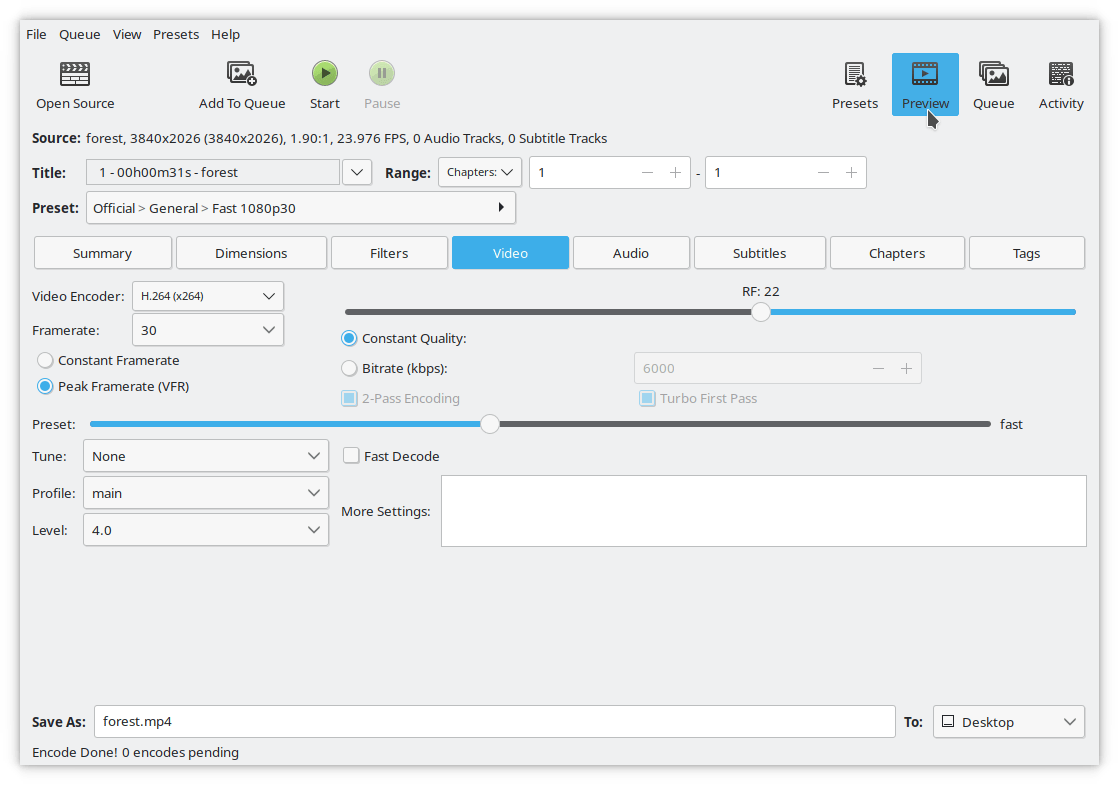
This will open a larger window with your source video ready to play. Using the slider, select the frame you wish to start the preview at, select a duration for the preview and then press the ▶ button.
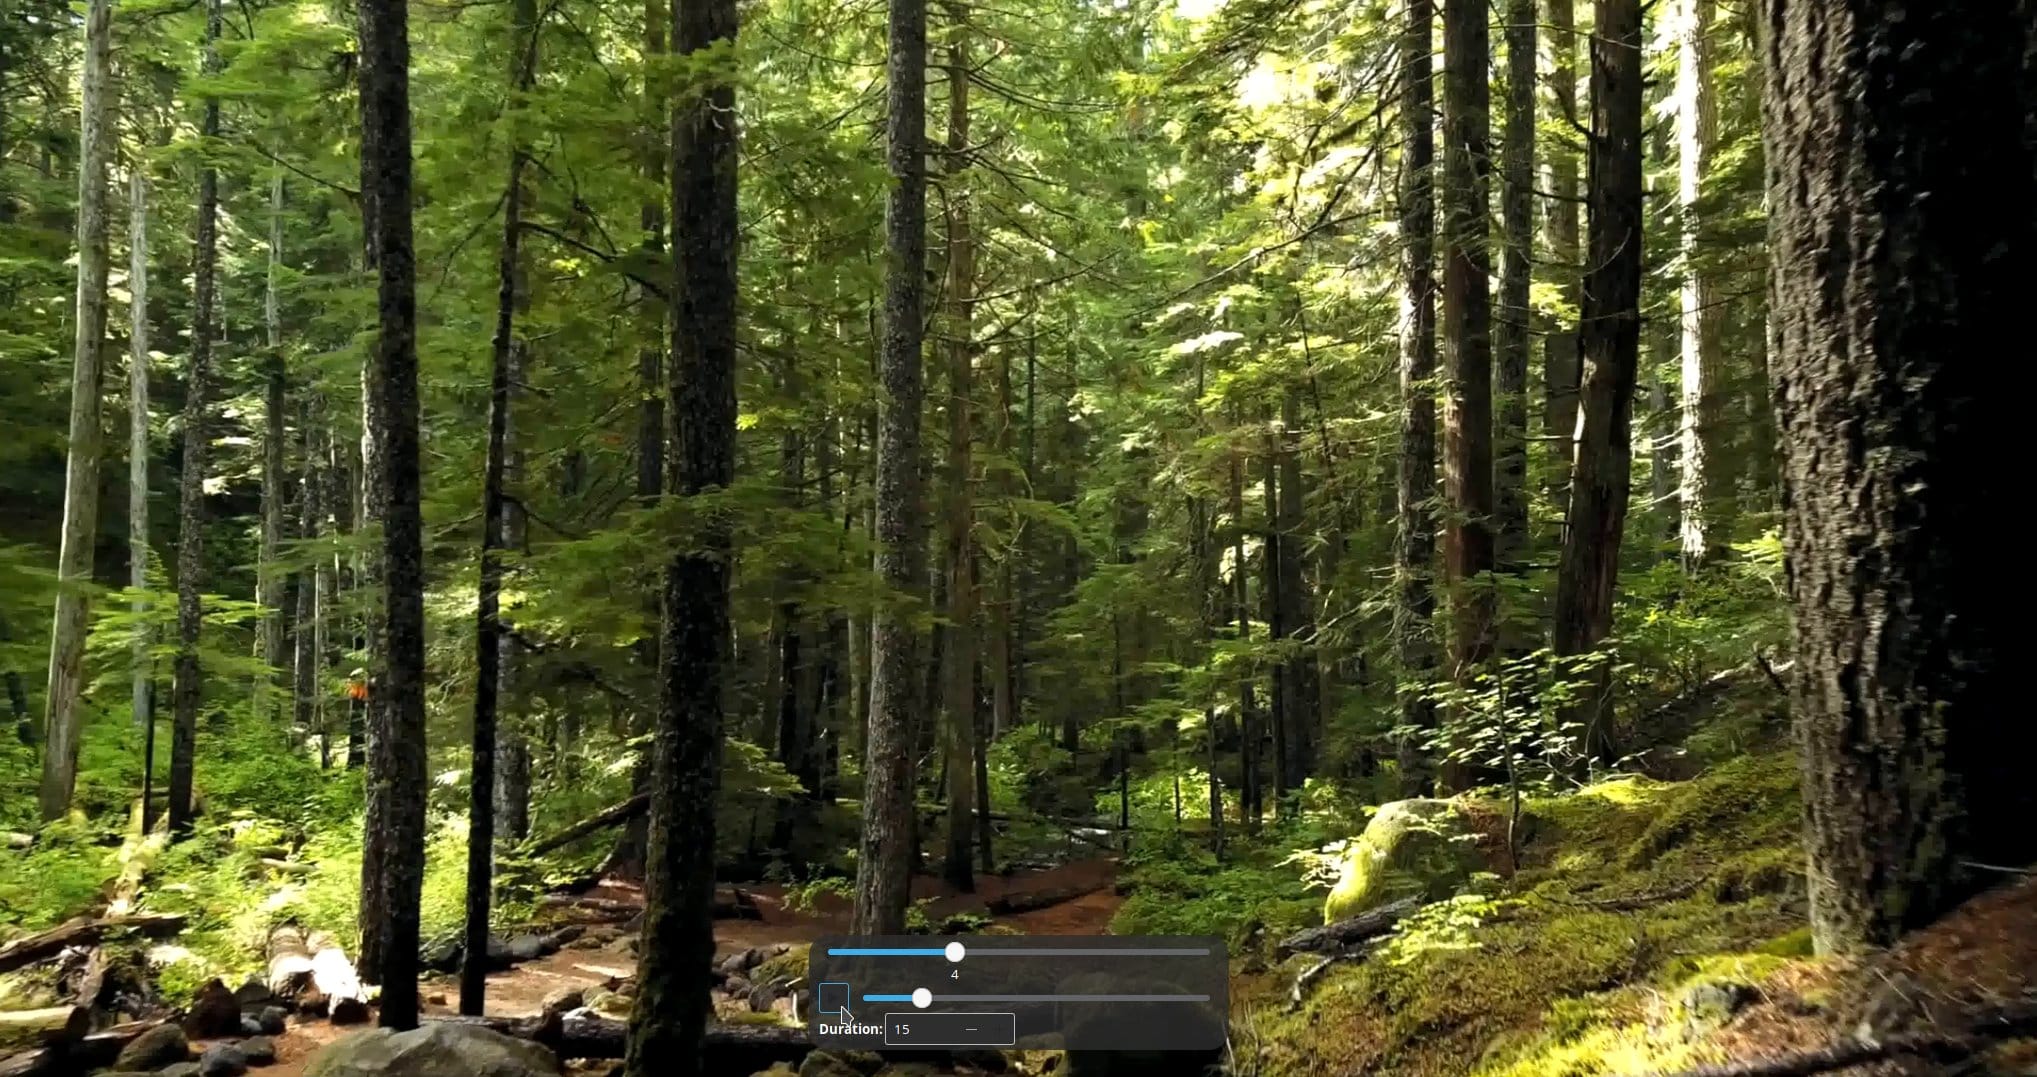
Handbrake will encode a small section of your video, using the settings you’ve selected, allowing you to see exactly what the final video will look like. This is extremely useful and saves a lot of time if you have a large or very long video to encode. Continue to tweak your quality settings and review a preview until you’re happy with the final quality.
Be careful you don’t decrease the quality settings too far. You’ll end up with a really small video, but with much worse visual quality. By way of example, here’s the Forest video encoded at a Quality Factor of 51 (most compressed, smallest file size). This produced a video with the smallest file size by far (1 MB), but also terrible quality (as would be expected):
Within the other sections of Handbrake (Dimensions, Filters, Audio, etc) you can manipulate your video in various ways to achieve the final output video you’re looking for. Some of the more common uses of these capabilities are to flip, rotate or crop your video or add / remove audio tracks.
Embedding a Streaming Video Into Your Website
Now that you have a video optimized for streaming, let’s get that video embedded into your website. For the purposes of this guide, I’m using the <video> HTML element, which embeds a media player that supports video playback in a web browser. This HTML5 video player is supported in all current browsers, including all major mobile browsers for both iOS and Android, so it’s expected to work across all modern devices and browsers.
Selecting a Video Player
The HTML5 player is a great choice for a lightweight and simple video player which requires no additional dependencies. If you have no needs beyond the reliable playback of video, start here.
Alternatively, there are a few third-party open source video players which provide more sophisticated functionality, support for adaptive media formats like DASH and HLS, greater ability for customization and support advanced features like Apple Airplay and Casting from an Android device. Two popular alternative video players are the Shaka Player from Google and Video.js . These are both fantastic options, but beyond the scope of this guide.
Implementing HTML5 Video
The HTML Video Embed element is a straightforward HTML element which embeds a media player into a website allowing for video playback.
In the most simple example, the configuration needed to support video playback is:
  <video controls width="<width value>" height="<optional height value>">
        <source src="<path to video file>" type="<mime type>">
        <source src="<optional path to another video format>" type="<mime type>">
      Message for browsers which can not play back your video.
  </video>
The video below was embedded with the following HTML. You’ll notice that I’ve only specified a desired width for my video, allowing the <video> element to calculate the needed height derived from the video file. Alternatively, you can specify just a width attribute, or specify both height and width.
    <video controls width="50%">
      <source src="forest-480p.webm" type="video/webm">
      <source src="forest-480p.mp4" type="video/mp4">
      Sorry, it looks like your browser can not play this video.
    </video>
I’ve also added two video sources in this example. It’s the same video, but in two different video container formats, webm and mp4.
WebM
is an open source project working to “develop a high-quality, open video format for the web that’s freely available to everyone”. In many different videos, the codec used to encode webm videos (VP8, VP9) results in a more compressed (lower file size) video with little loss in video quality. One downside of webm is that it’s not
fully supported
across all web browsers. At this time of this writing, webm is not fully supported in Safari on macOS, Safari on iOS or Internet Explorer. Knowing this, I added a second video <source> with a more-standard mp4 video. Your web browser will read down the list of sources until it finds a video format it supports. If there are no video formats which a web browser can play, it will then display the error message you specify.
The HTML <video> element provides a small number of configuration attributes,
which are well documented
. Aside from specifying the player size, you can specify things like automatically start playback, show/hide video controls, looping the video, etc.
One of the more common HTML <video> attributes is poster, which allows for a custom image to be shown while the video is being downloaded, or until playback starts. Poster images are the video preview images you see while scrolling around for something to watch on YouTube for example.
Here’s a little more advanced example for our Forest video, with a defined poster image and the controls for Download and Full Screen hidden:
  <video
    width="100%"
    poster="forest-poster.jpg"
    controls
    controlslist="nodownload nofullscreen"
  >
    <source src="forest-480p.webm" type="video/webm">
    <source src="forest-480p.mp4" type="video/mp4">
    Sorry, it looks like your browser can not play this video.
  </video>
In Conclusion
While we covered a lot in this post, it’s a simple set of steps to optimize streaming video for your website:
- Convert the source video into a format suitable for streaming
- Unless you have good reasons, no resolution larger than 1080p (1920x1080)
- Ensure “Web Optimized” is selected in Handbrake (or
-movflags +faststart) if using ffmpeg
- Use the default HTML
<video>element to embed your video in a website or blog- If needed, explore Shaka Player or Video.js for more advanced use cases