Hacking Into a 20 Year Old TiVo — Part 2; VirtualBox to the Rescue

If you haven’t yet, I encourage you to read through Part 1 of this series, where we worked through getting access to the TiVo’s disk drive(s) and creating virtual disk images which we’ll use from this point forward.
VirtualBox Setup
We’re going to use VirtualBox as the platform to create a virtual Linux workstation, into which we’re going to build and install the tools needed to extract data from our TiVo disk images. It should be possible to eliminate the need for a VM, working directly on a physical Linux host but I prefer some of the niceties VirtualBox provides like Shared Folders and VM snapshots, and also complete system isolation. Also by using VirtualBox, your TiVo virtual disk images are presented to the virtual OS as block devices, which is what mfs-utils is expecting. This makes our future life much, much easier. Let’s get going!
Using your distro’s package manager get VirtualBox installed:
sudo apt-get install virtualbox
You’ll also need to download the Debian Buster net installer ISO image.
New VM Setup
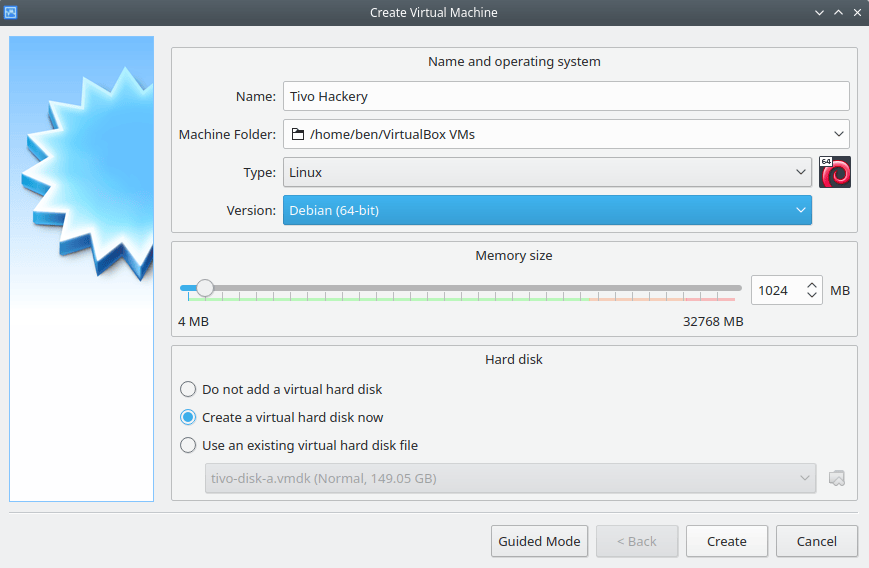
Once VirtualBox is installed, let’s get a new VM setup. Walk through the “New” VM wizard, with the following selections:
- Type: Linux
- Version: Debian (64-bit)
- Memory: 1024 MB
- Create a New Virtual Hard Disk Now
- I prefer, for no reason aside from I’m more familiar, a VMDK Machine Disk
- Dynamically allocated, or fixed size — your choice
- 8 GB size is totally sufficient
Once your new VM has been configured, go into the Settings for that VM, and select Storage.
Within the Storage configuration Window, we are going to do a few things to simplify our work later on:
- Select Controller: SATA, and click the “Removes Selected Storage Controller” button
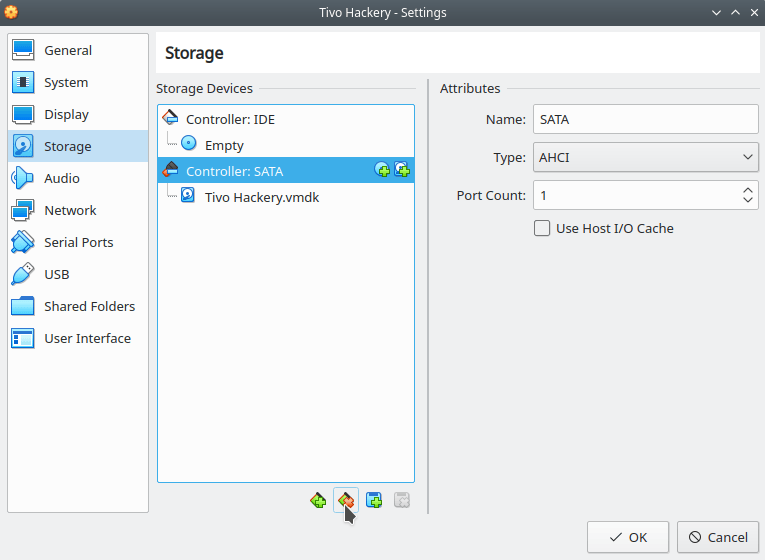
- Now, click the “Adds Hard Disk” icon next to Controller: IDE
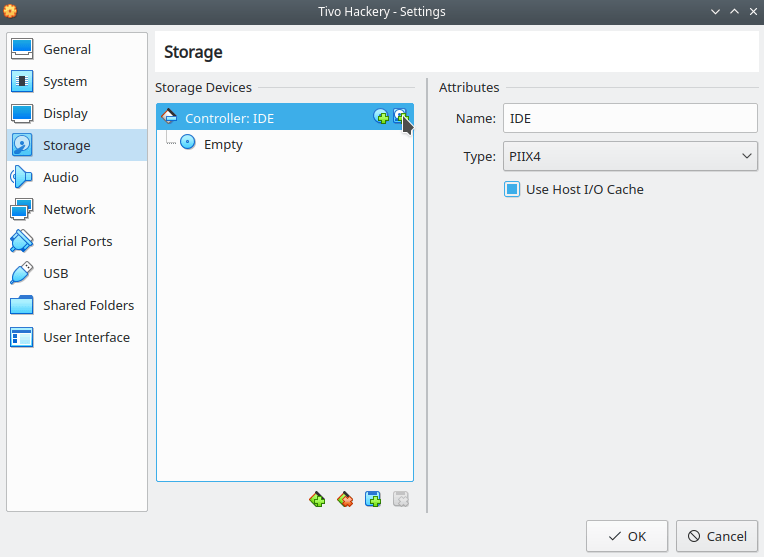
- Select “Choose Existing Disk”
- Select the virtual hard disk file which was just created. Mine is called Tivo Hackery.vmdk, and you probably have only one.
- You’ve just configured your Debian hard disk image as the Primary Master IDE device
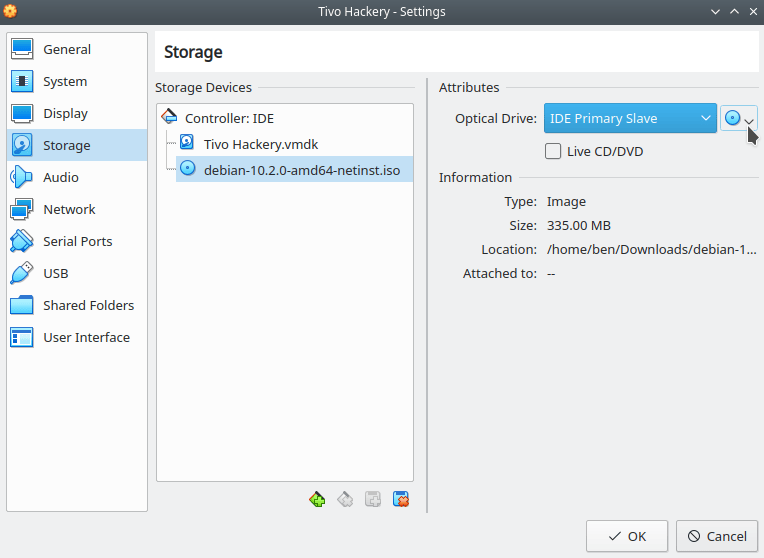
- Click on the “Empty” optical drive, and in the attributes section, change it to Primary Slave
- Now click on the CD-ROM icon to select the Debian netinstaller ISO image you downloaded earlier.
At this point, your initial configuration is complete, so it’s time to start the VM.
Debian Installation
If all went well, you’ll be presented with the Debian Installer Screen
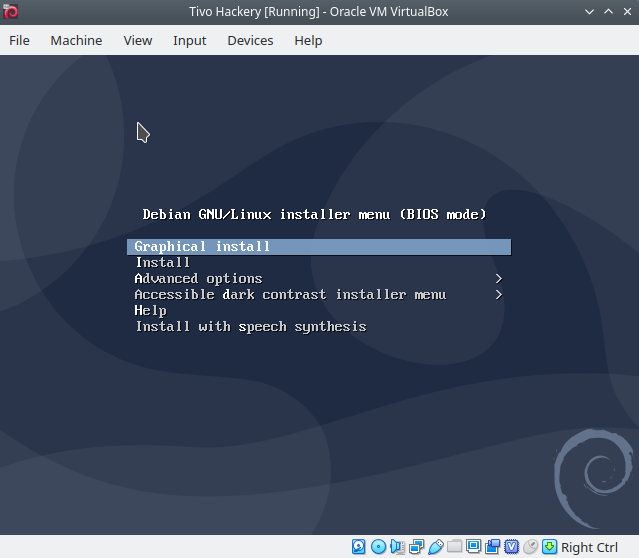
Proceed with the install, selecting options as you like. For our purposes, you can select most of the default options, with the following exceptions
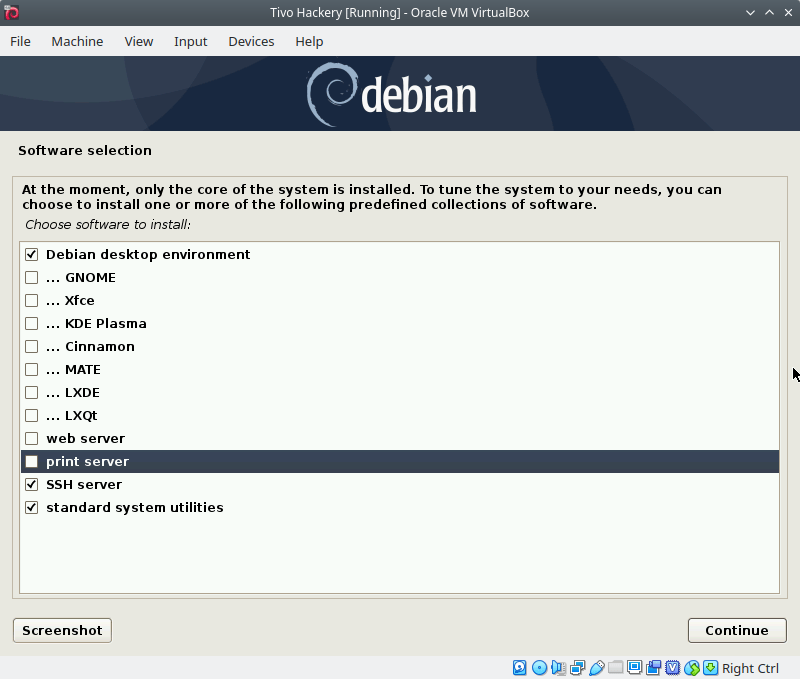
- At the Software selection screen, deselect the print server
- At the Software selection screen, select the SSH server
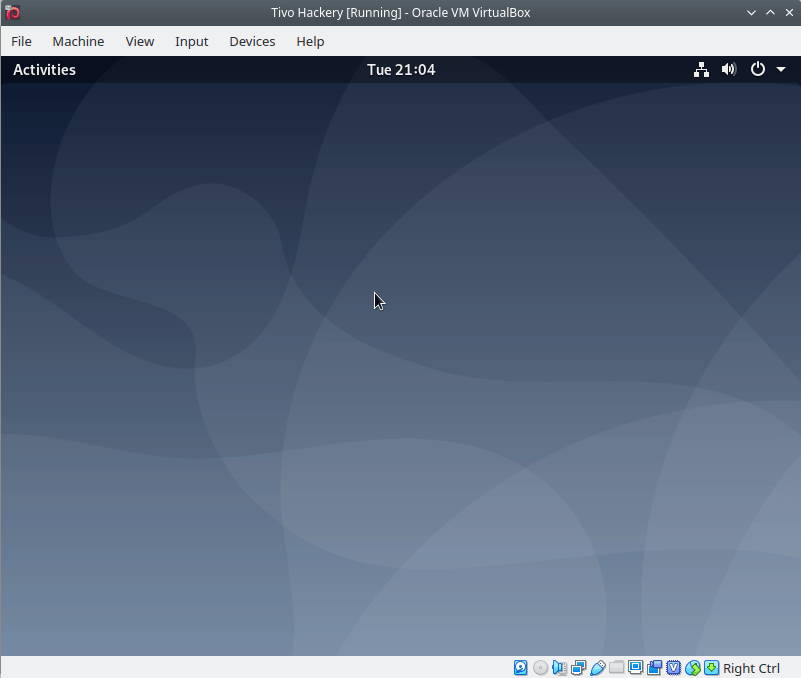
After installation, and if all went well you’ll be booted into a crisp, fresh Debian virtual machine
VirtualBox Guest Additions Installation
After the install has completed, there are a few additional configuration items needed to get your Debian VM in a state where it’s useful to us.
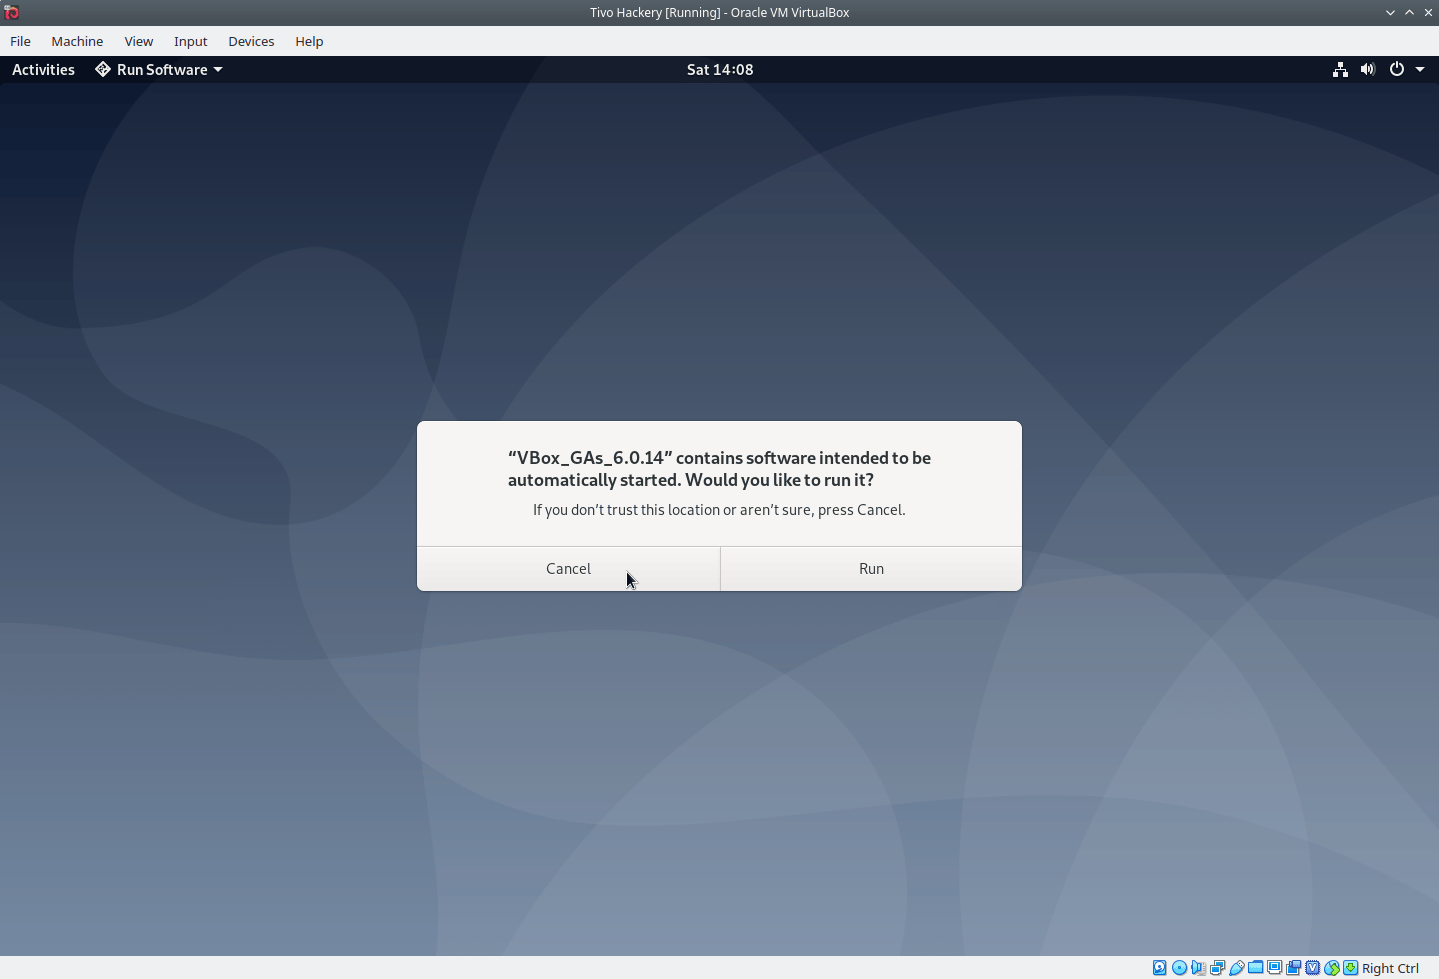
- Within the Debian VM’s window, click the Devices Menu and select “Insert Guest Additions CD Image…”
- When prompted with a pop-up click on the “Cancel” button, we need to install some additional packages to enable the Guest Additions kernel modules to be built, so we’ll do this manually.
To install the Guest Additions manually, click the “Activities” bar in the upper left of the screen, search for and open Terminal. Within the terminal window enter the following:
sudo apt-get install build-essential module-assistant
sudo m-a prepare
sudo sh /media/cdrom0/VBoxLinuxAdditions.run
This installation process will likely take a minute or so, and you should see some status output similar to the following:

Shared Folder Setup
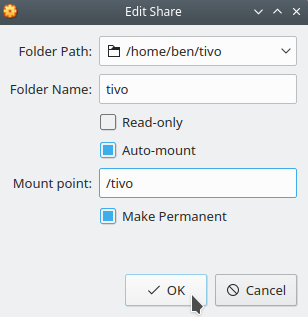
We’ll be using the Shared Folder functionality of VirtualBox to allow for file sharing between our Debian VM and our Linux host machine. Enter the settings for your VM, and select “Shared Folders”
Complete the information requested to setup a shared folder and ensure that you select “Auto-mount” and “Make Permanent”. We’ll want this shared folder to always appear within our VM.

I would suggest you create a dedicated tivo directory on both your Linux workstation and your Debian VM — this helps to keep your work orderly, in a single place and easy to remember.
At this point, go ahead and restart the system to load the new Guest Additions kernel modules, and get your Shared Folder mounted in your VM.
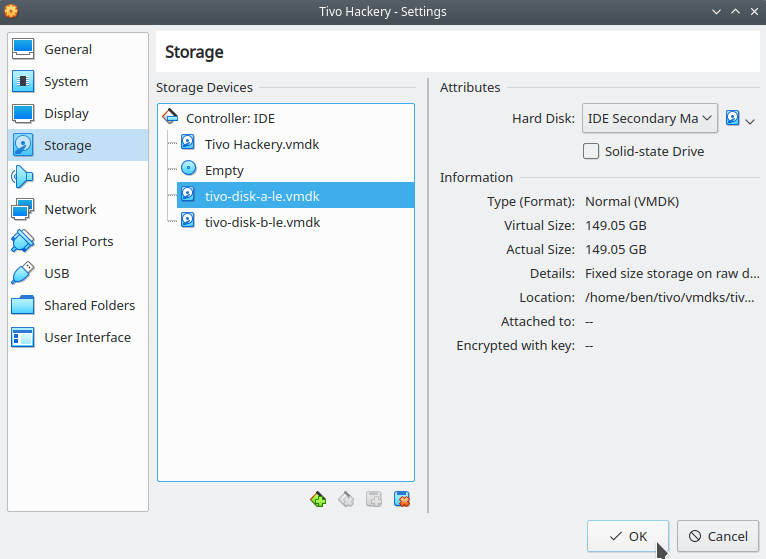
Attaching TiVo drives to a VM
We’ll be configuring the TiVo disk images created earlier within our VirtualBox VM, which will allow us to access their contents later on.
The disk images we created are an exact bit-for-bit copy of our TiVo’s hard drive, so we’re able to “mount” them into our VM and they’ll present to the OS as a standard, physical IDE drive.
Before we’re able to get these drives configured with VirtualBox, we need to translate them into a format that VirtualBox can understand: VMDK.
The recommended option is to create a new VMDK file which references the TiVo disk image as it’s backing store (repeat this for both Drive A and Drive B (if present)):
VBoxManage internalcommands createrawvmdk -filename tivo-disk-a.vmdk -rawdisk tivo-disk-a.img
This newly created VMDK file will contain no data, all reads/writes will be passed through to the TiVo disk image.
Now you need to configure these VMDK disks within your VM. Disk A needs to be Secondary Master, and Drive B (if you have one) needs to be Secondary Slave.
Software Installation
At this point we have VirtualBox setup and ready to go, we’re much closer to actually exploring the TiVo MFS filesystem.
To get our environment setup, ensure that you’re working within the Terminal application in your Debian VM.
Install the following packages:
sudo apt-get install git libncurses-dev
Clone the mfs-utils Github repo:
git clone https://github.com/elitak/mfs-utils.git
Build and install mfs-utils:
cd mfs-utils
make all
sudo cp -r bin.Linux-x86_64/* /usr/local/bin/
To Be Continued…
Whew, we made it through the most tedious part of this project! In
Part 3
, we’ll be using this VirtualBox VM to setup mfs-utils, explore our virtual TiVo hard disks and finally extract some video!