Vintage Computer Up in Smoke? Here’s How to Fix It
Table of Contents
If you have a vintage PC or Macintosh Computer, including the Apple //, Apple //e, Macintosh 128K, Macintosh 512K, Macintosh Plus, Macintosh SE or Macintosh SE/30, there’s a very high chance that you have a RIFA filtering capacitor installed in your power supply which is close to failure.
If you’ve ever been using a vintage computer and it started to spew noxious smelling smoke, this capacitor has just failed and must be replaced. Fortunately, this is a straightforward project requiring less than $3 in parts and simple through-hole soldering.
Also, if you’ve just acquired a vintage PC or Macintosh, it’s a really good idea to replace this capacitor as a preventative measure before it fails.
Many non-Apple IBM-compatible computers from the late 1970s through the 1980s also utilize the exact same RIFA capacitor, which fails in the exact same way. While this guide is specific to capacitor replacement for vintage Macintosh computers, the overall guidance, parts list and replacement techniques would remain the same.
Hardware Needed

The process as documented here was performed on a Macintosh Plus. While the exact disassembly, discovery and reassembly process may differ for your machine, the general information remains the same. The Apple Macintosh Computer Repair Resources website and the Macintosh Repair & Upgrade Secrets book are fantastic resources for guidance on disassembly and overall vintage Macintosh repair.
Macintosh Plus Disassembly
Like other earlier Compact Macs, removing the outer case is straightforward with the removal of 5 T15 torx screws from the rear of the case.
Once the torx screws have been removed the rear case simply slides off. This leaves the actual computer components in place, attached to the frame which is supporting the front half of the computer.

CRT monitors operate with extremely high voltage, 10kV - 15kV (10,000 - 15,000 Volts), which at a high enough amperage is absolutely fatal to humans. This charge dissipates over time, however there is a very real possibility that your CRT still has a charge in it’s capacitors and therefor could provide a nasty shock.
Please familiarize yourself with the procedure to safely discharge your CRT’s anode cap before venturing further.
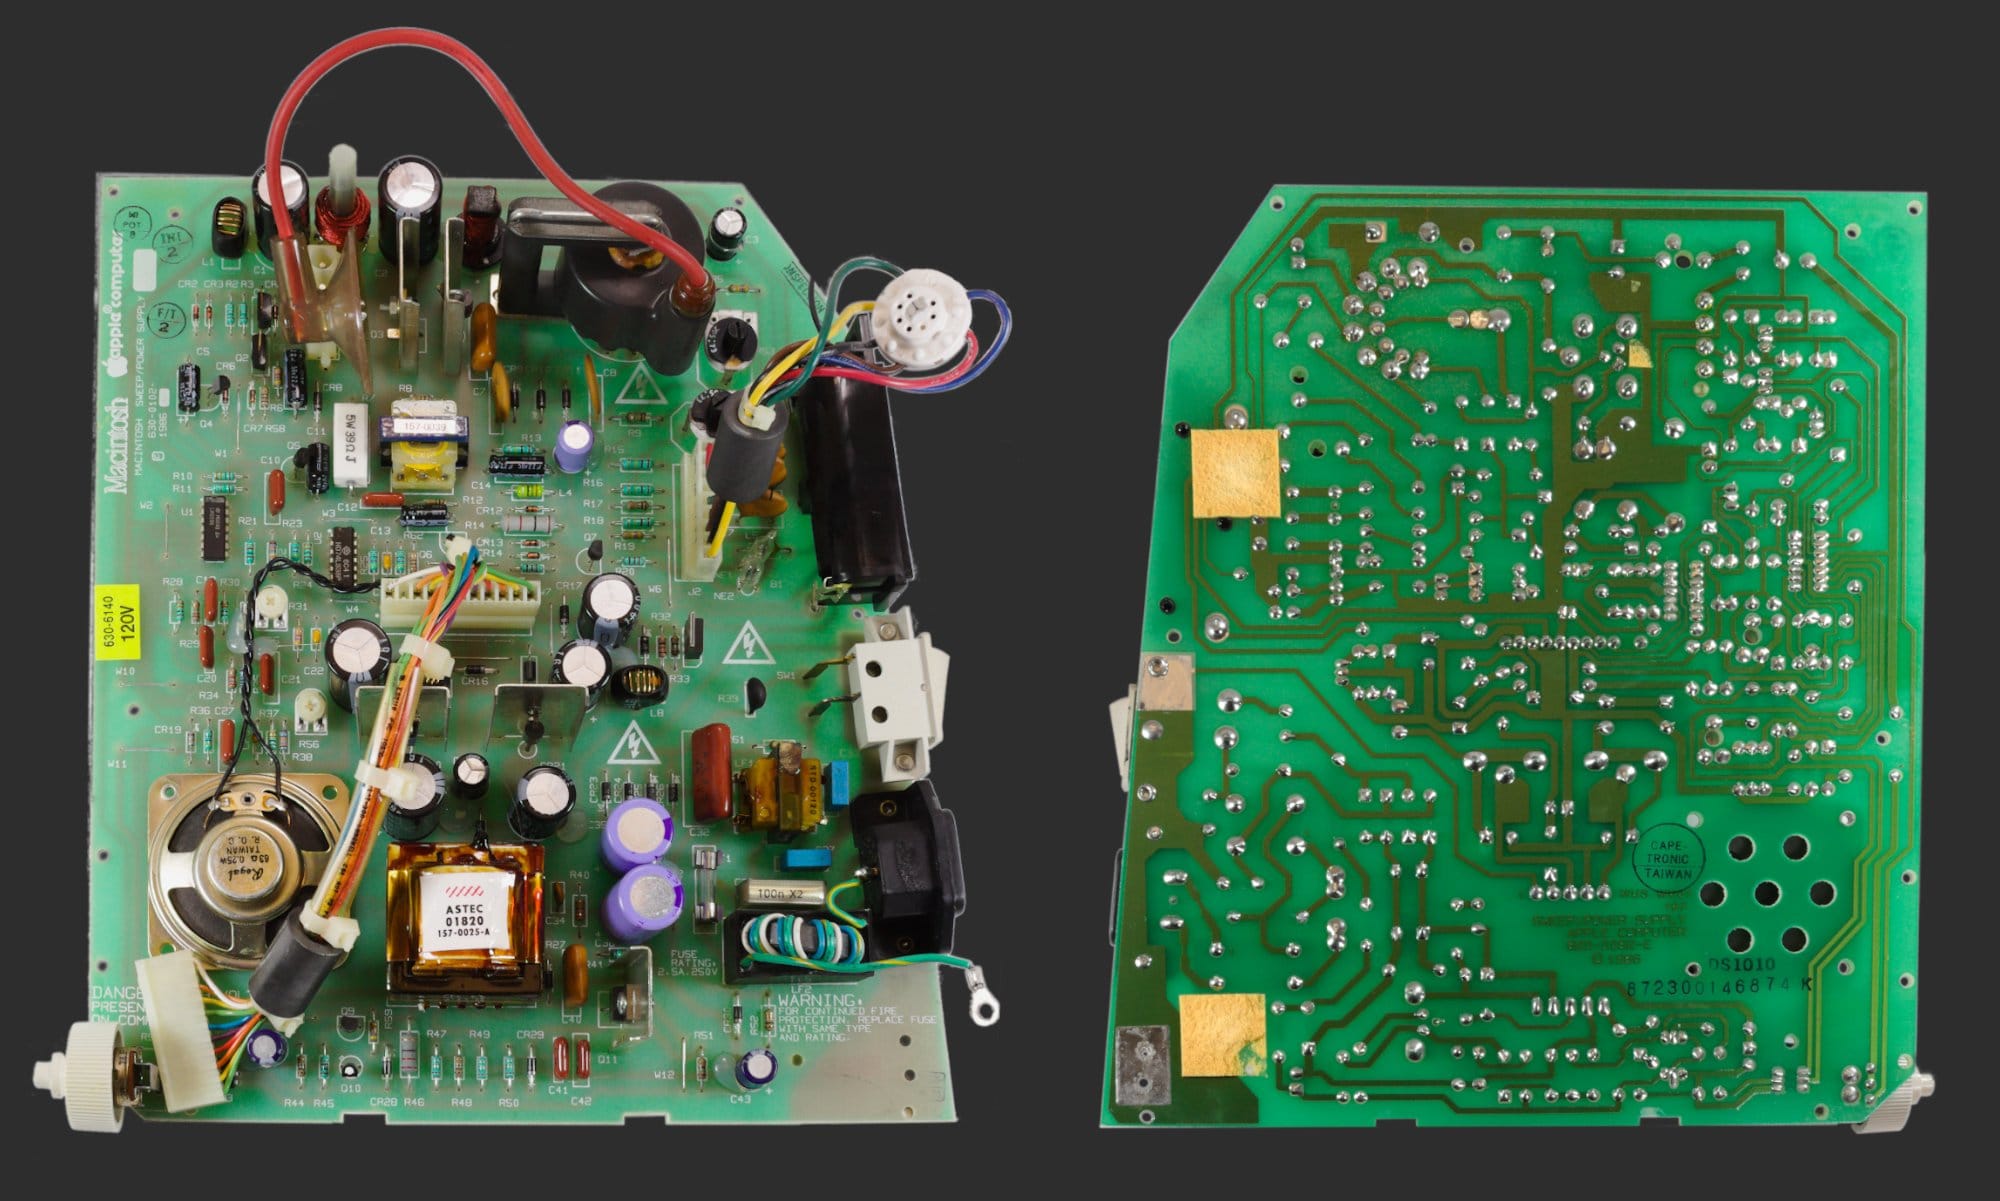
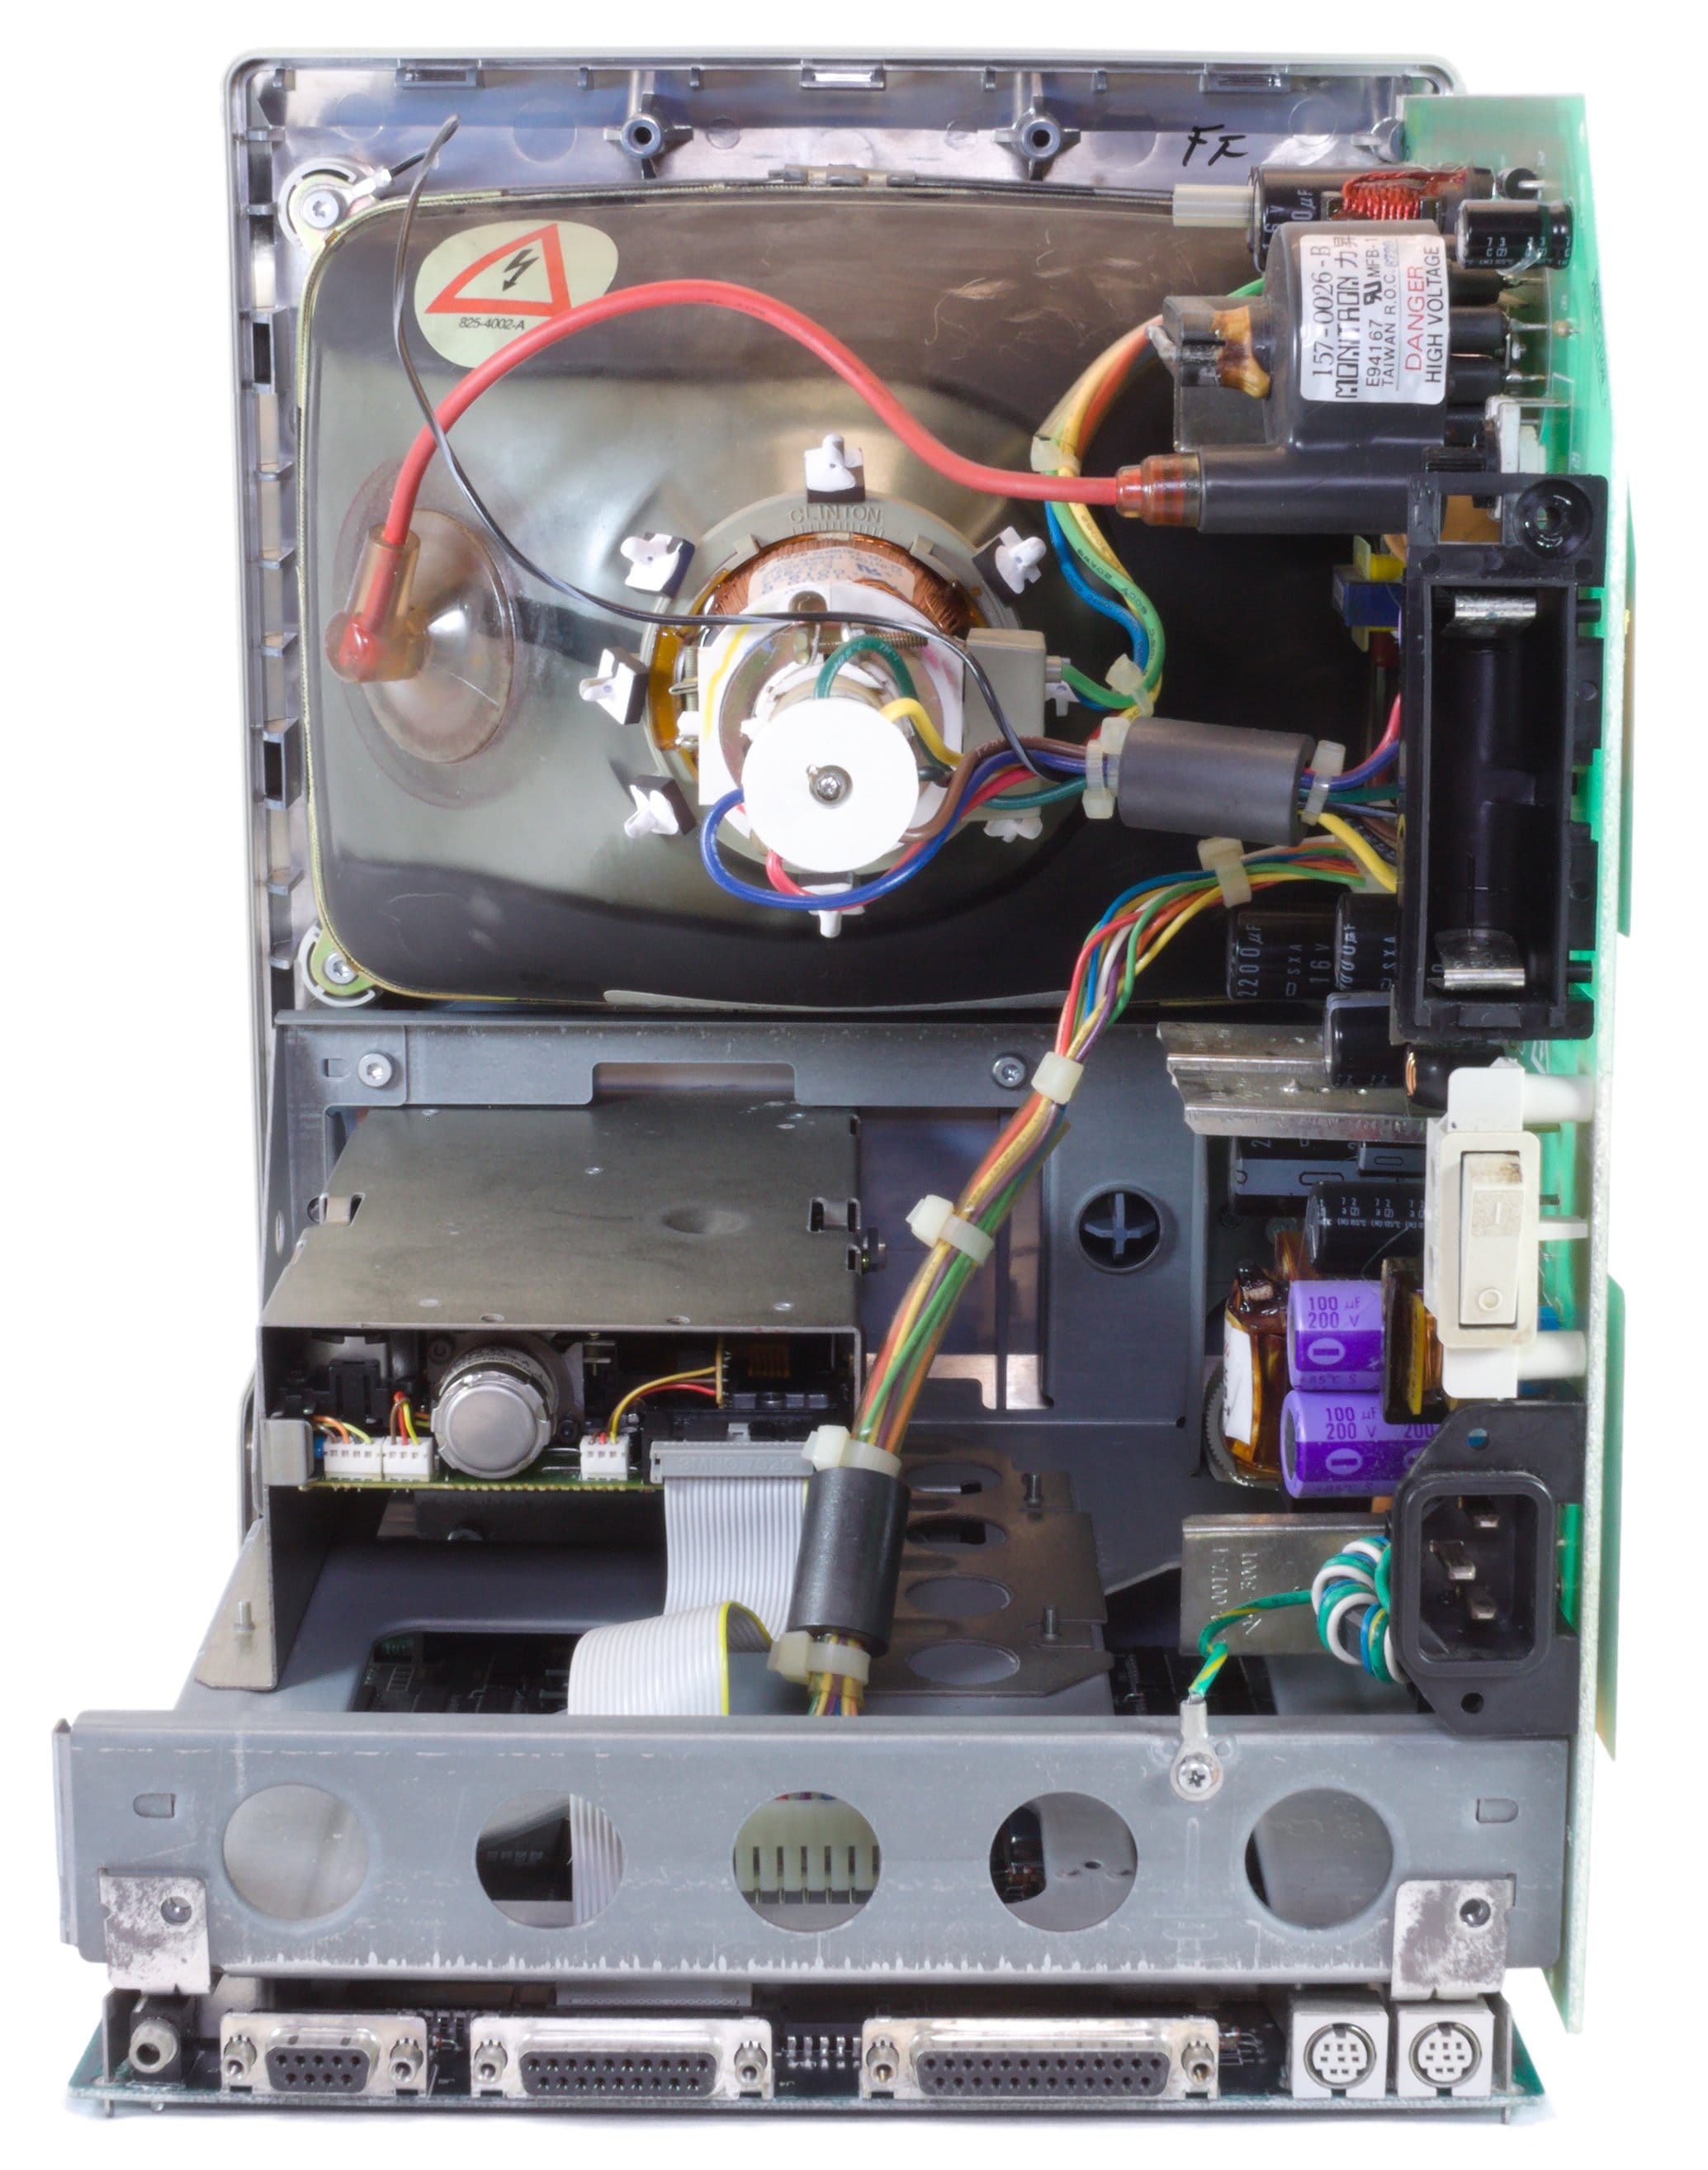
To access the analog board, which contains the circuitry for the power supply you need to disconnect the floppy disk cable, power supply cable, ground screw, neck board connector and the anode cap.
iFixit has a terrific teardown guide which should provide the detail needed to successfully complete this disassembly.
Once your CRT has been discharged and the anode cap removed from the back of the CRT, you’re now able to remove the analog board from the rest of the computer.
Carefully slide the analog board up and out of the case making sure all wires and connectors are completely free. You also need to remove the white protective cover from the back of the analog board.
You can now set the remainder of your Macintosh Plus aside, as you only need the analog board for the remainder of this project.
Capacitor Replacement
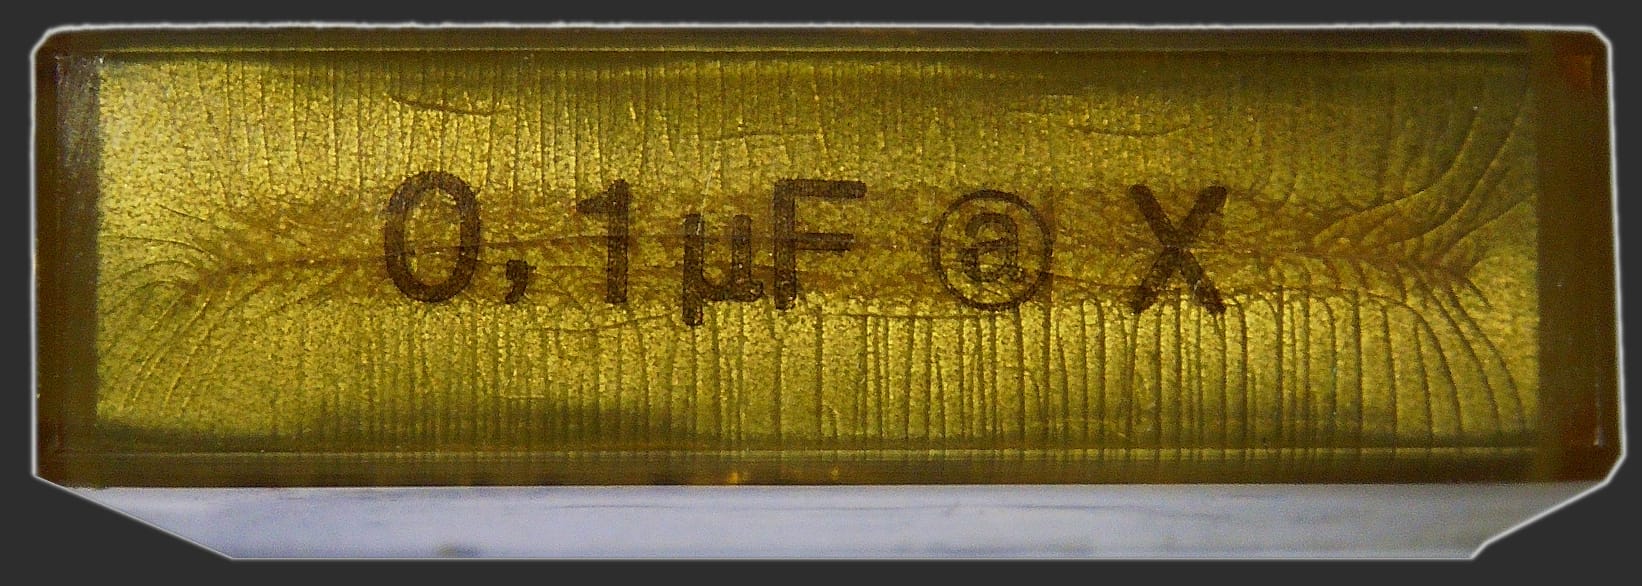
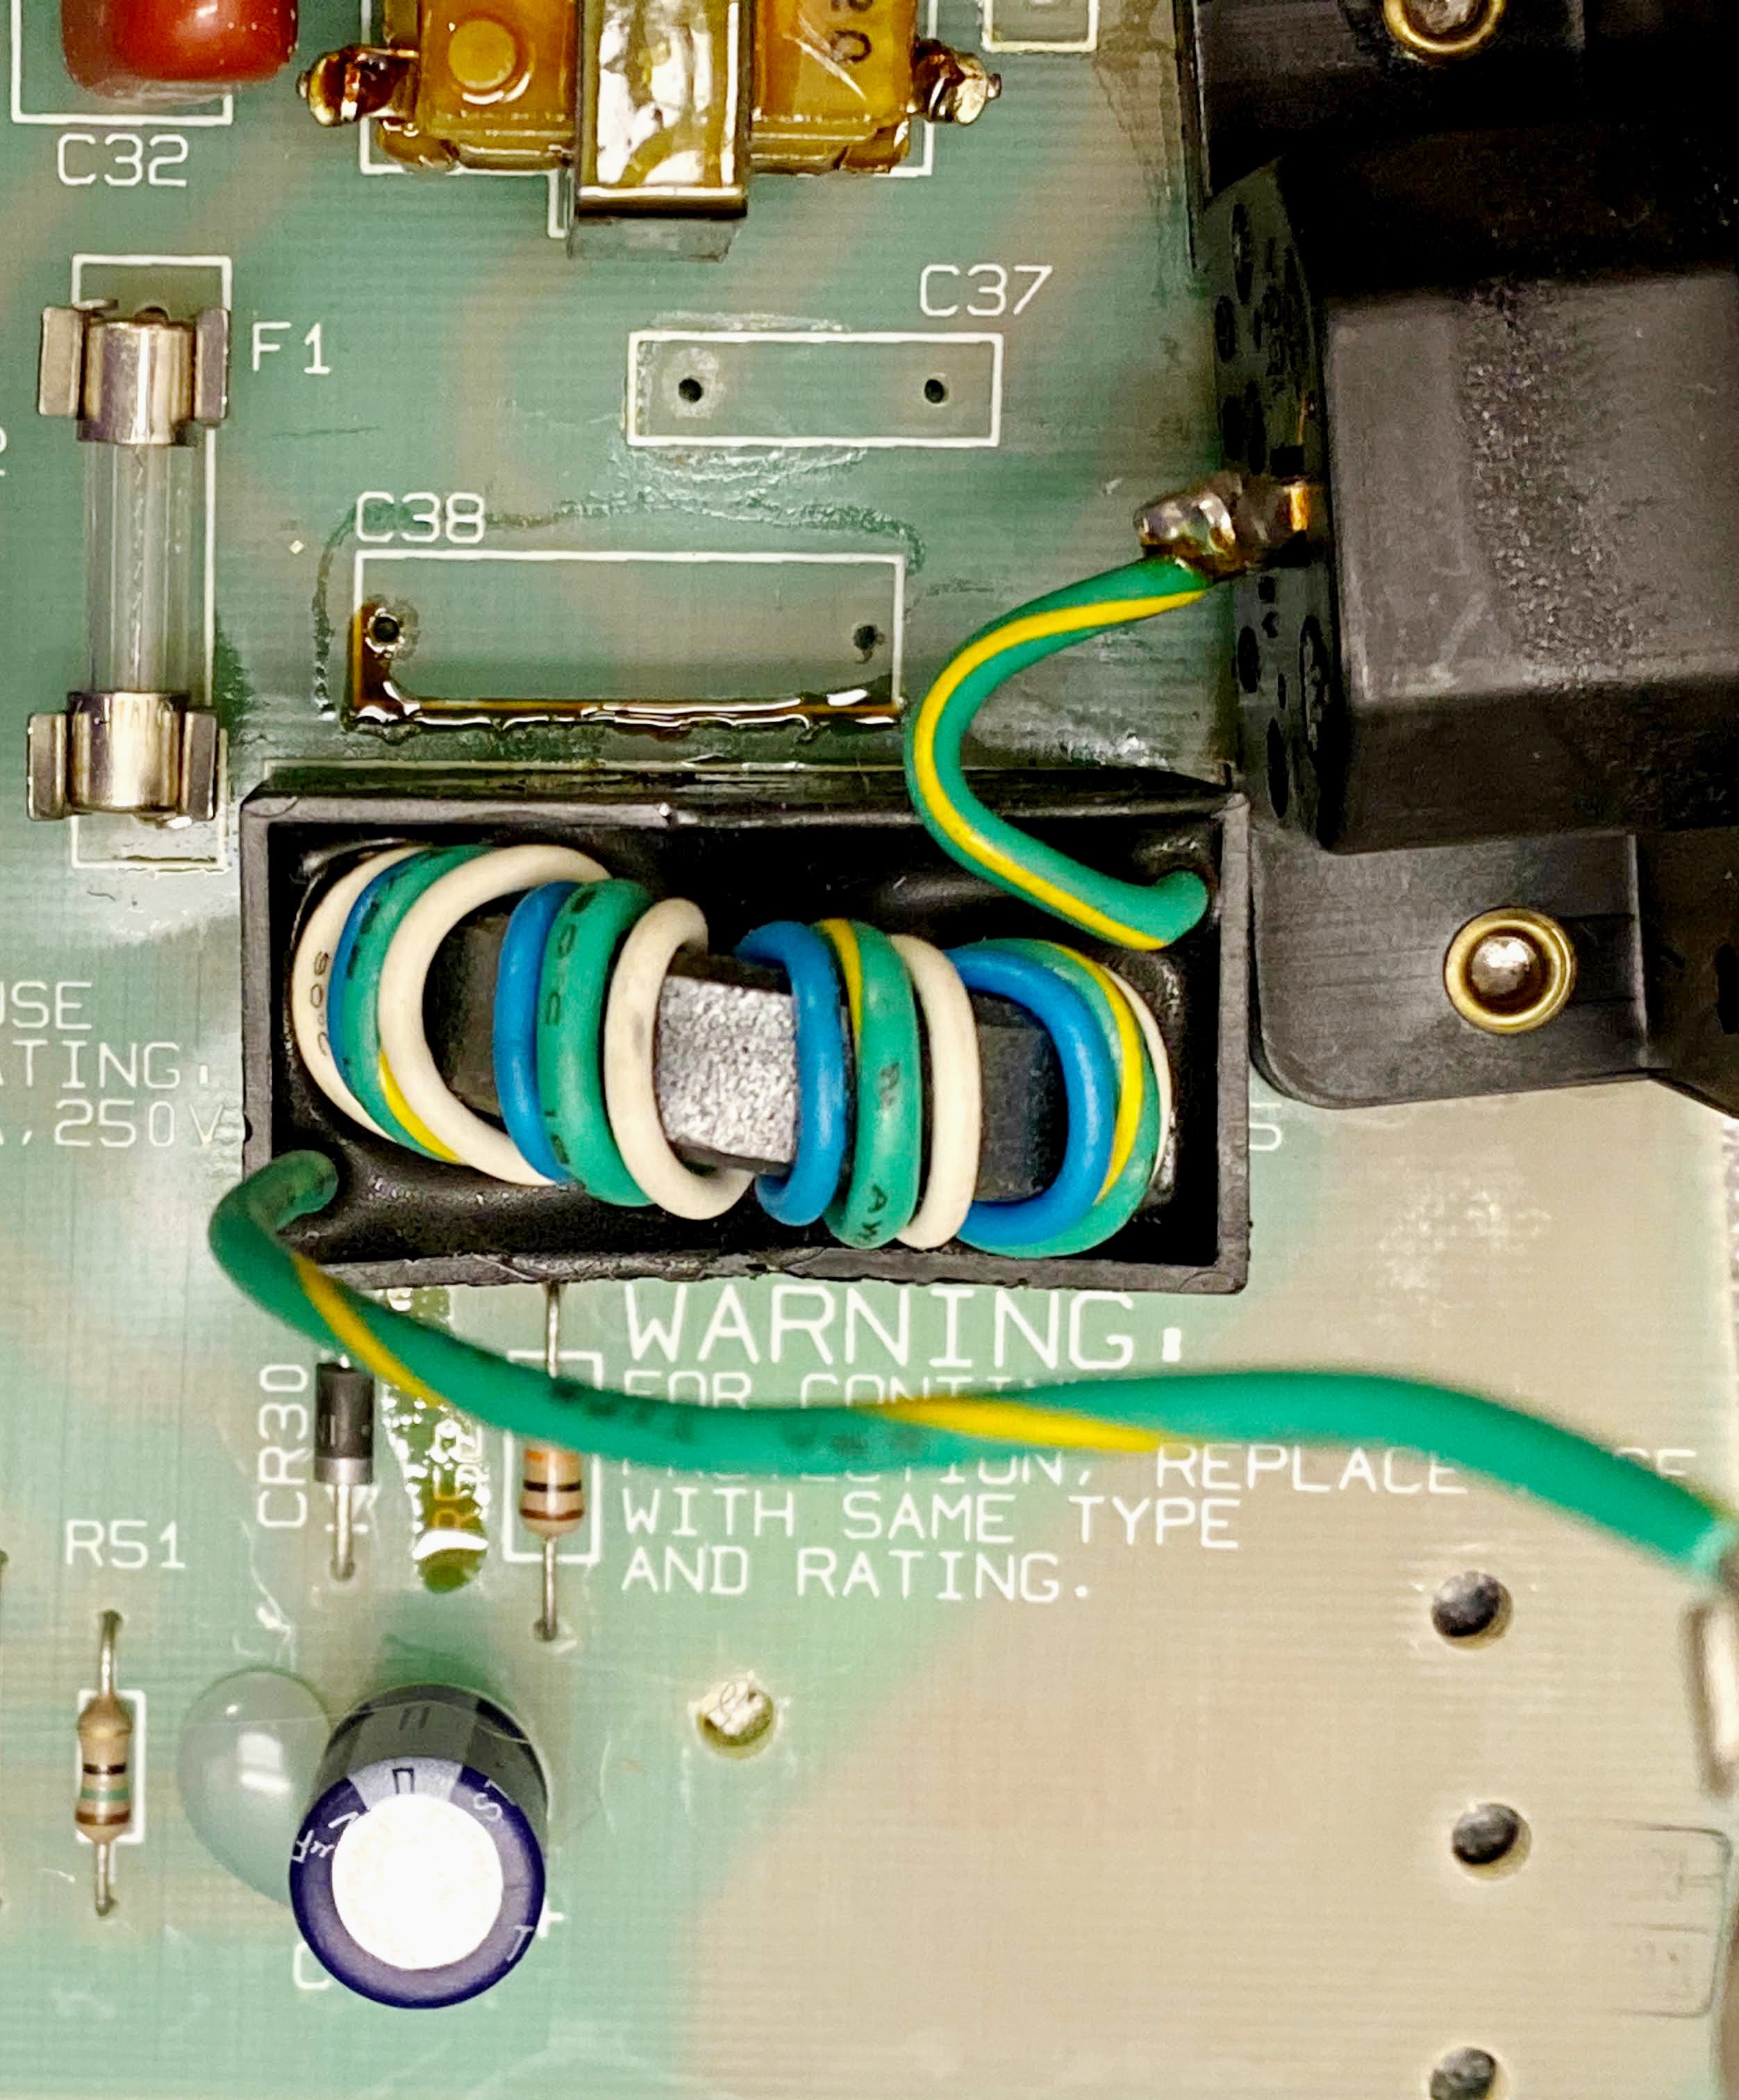
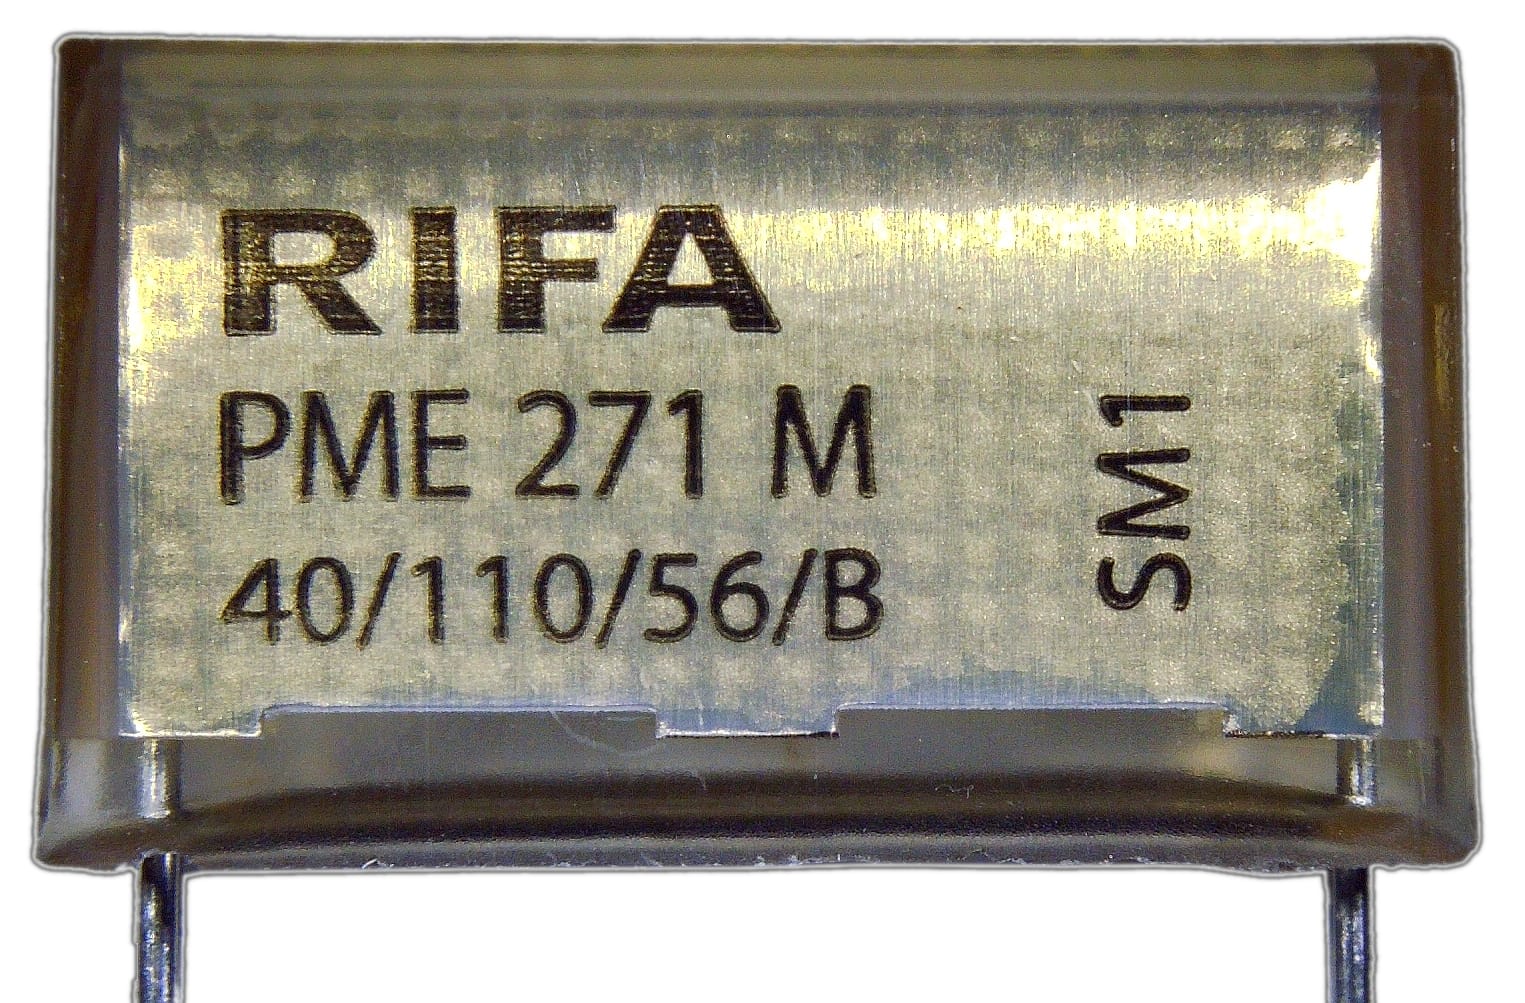
You are looking for a rectangular, yellow film capacitor on the circuit board next to the power socket. This is the RIFA brand filtering capacitor for the Macintosh power supply, and the capacitor you will be replacing.
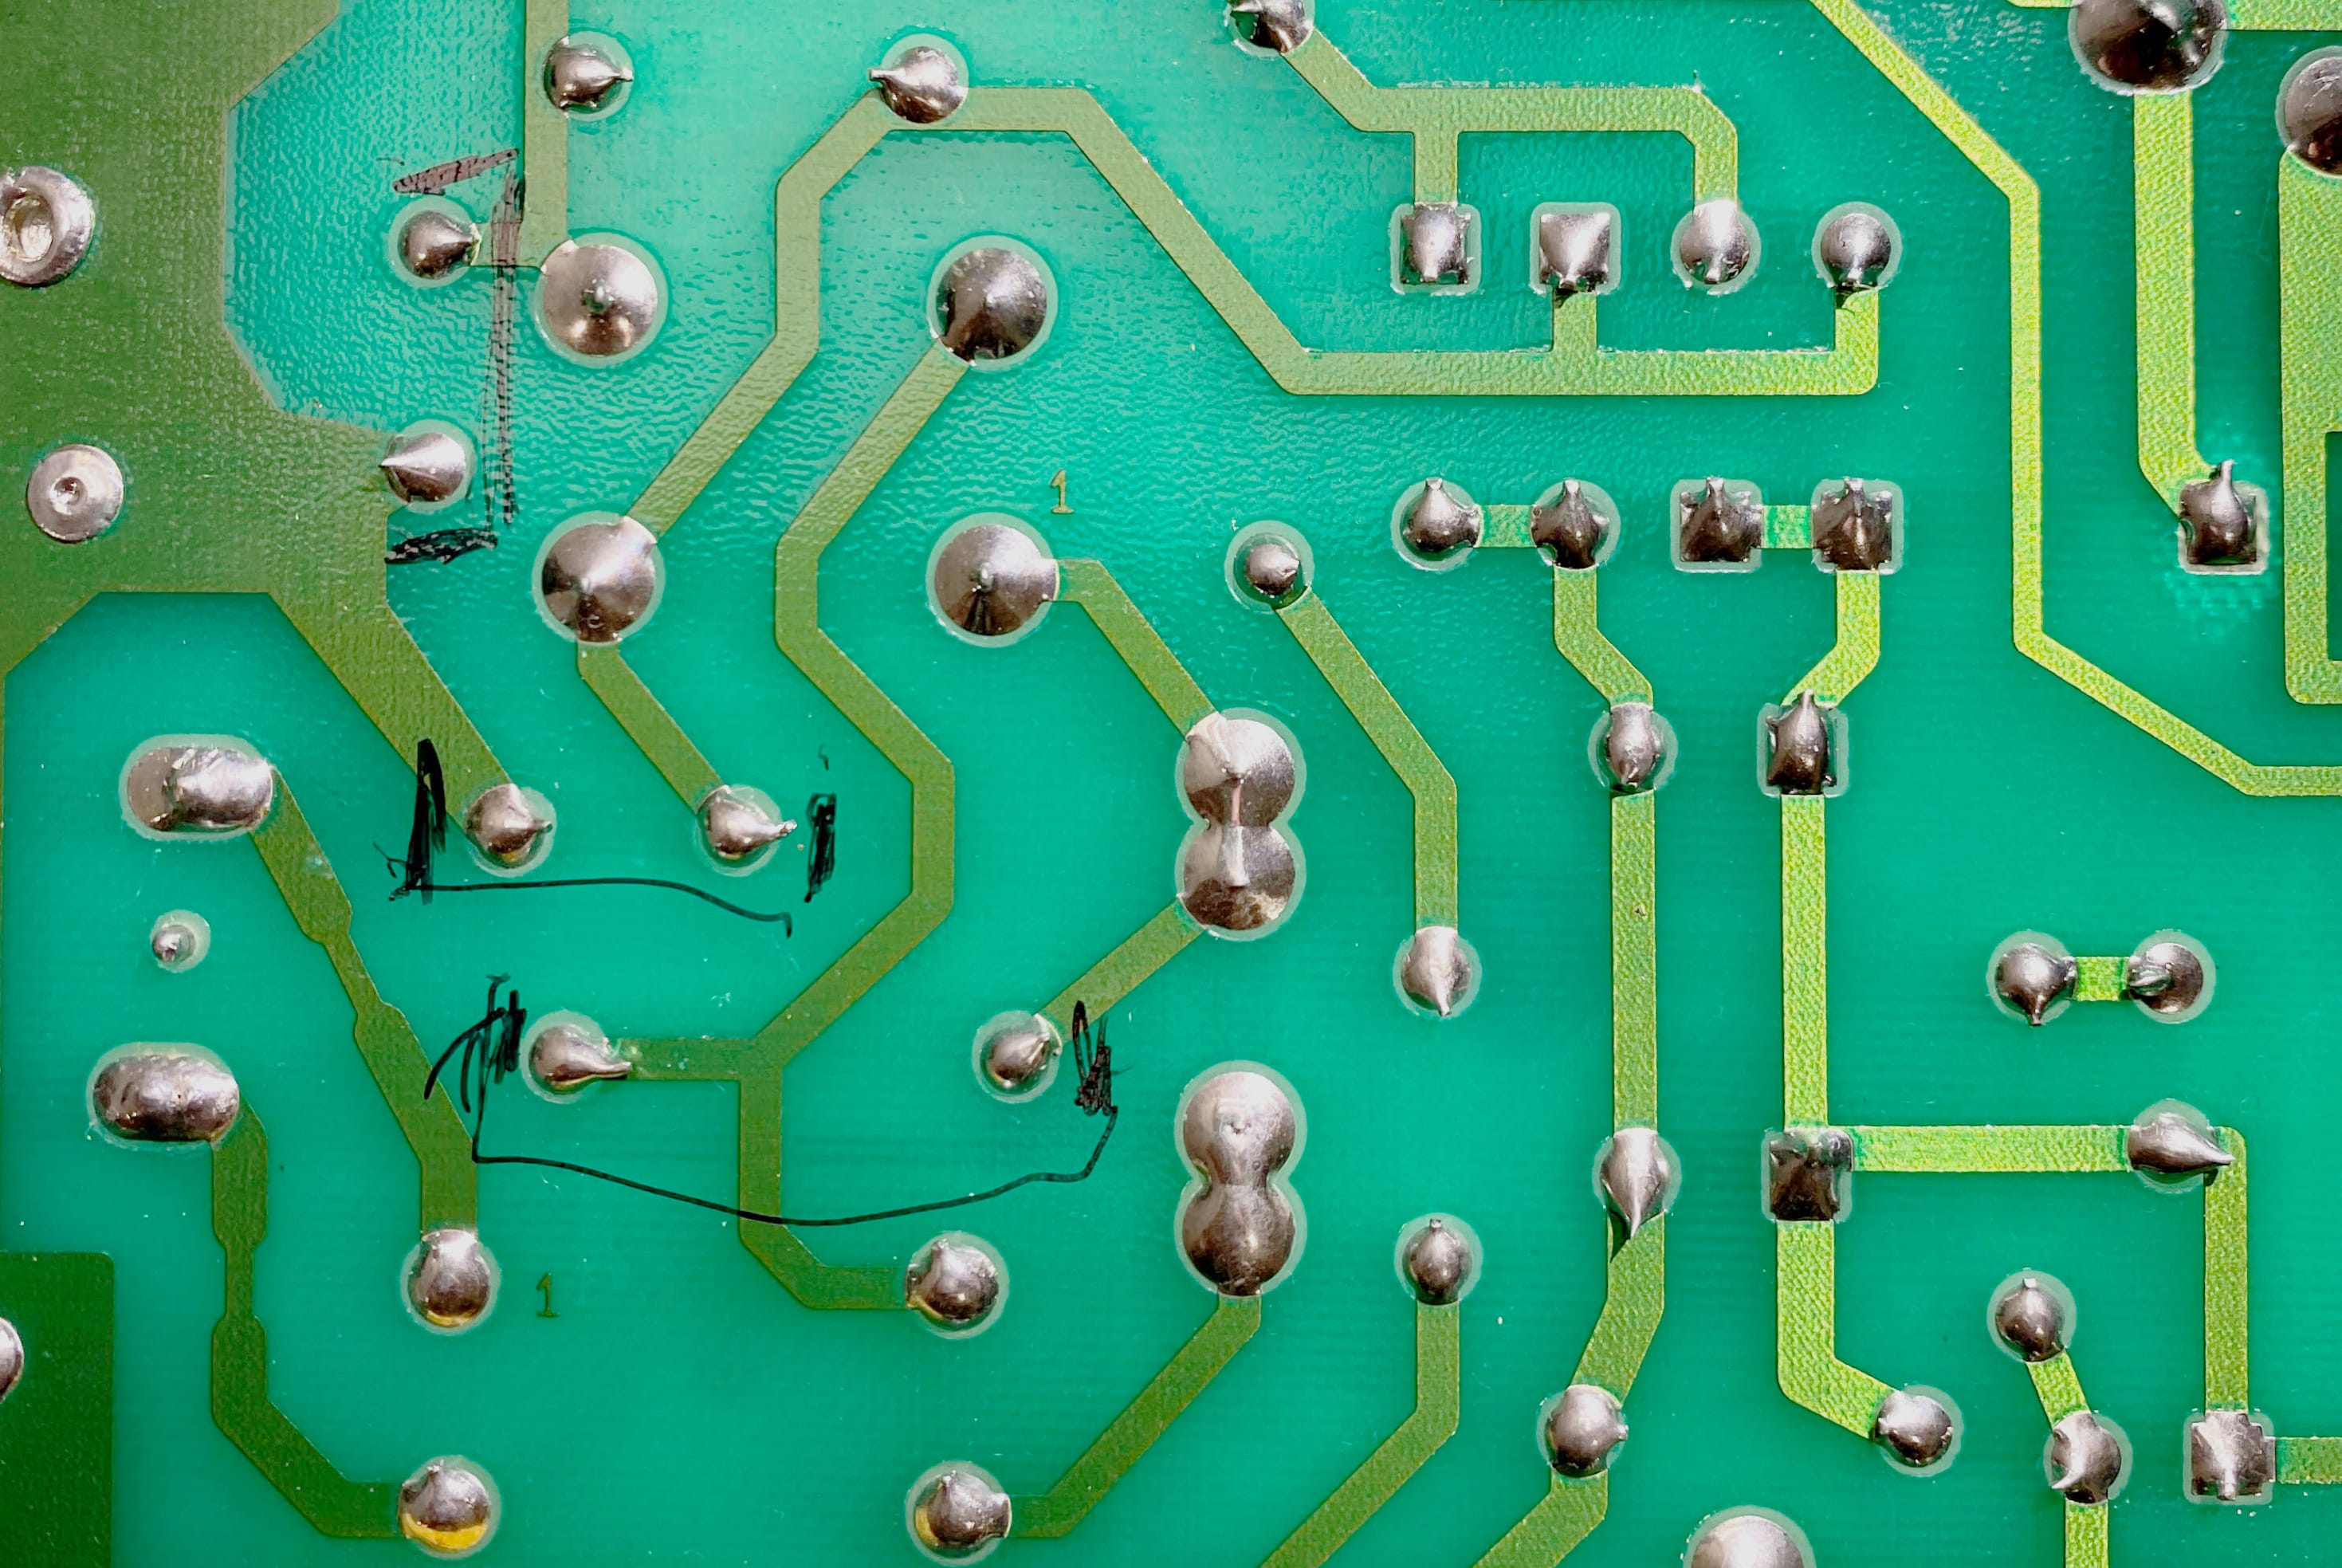
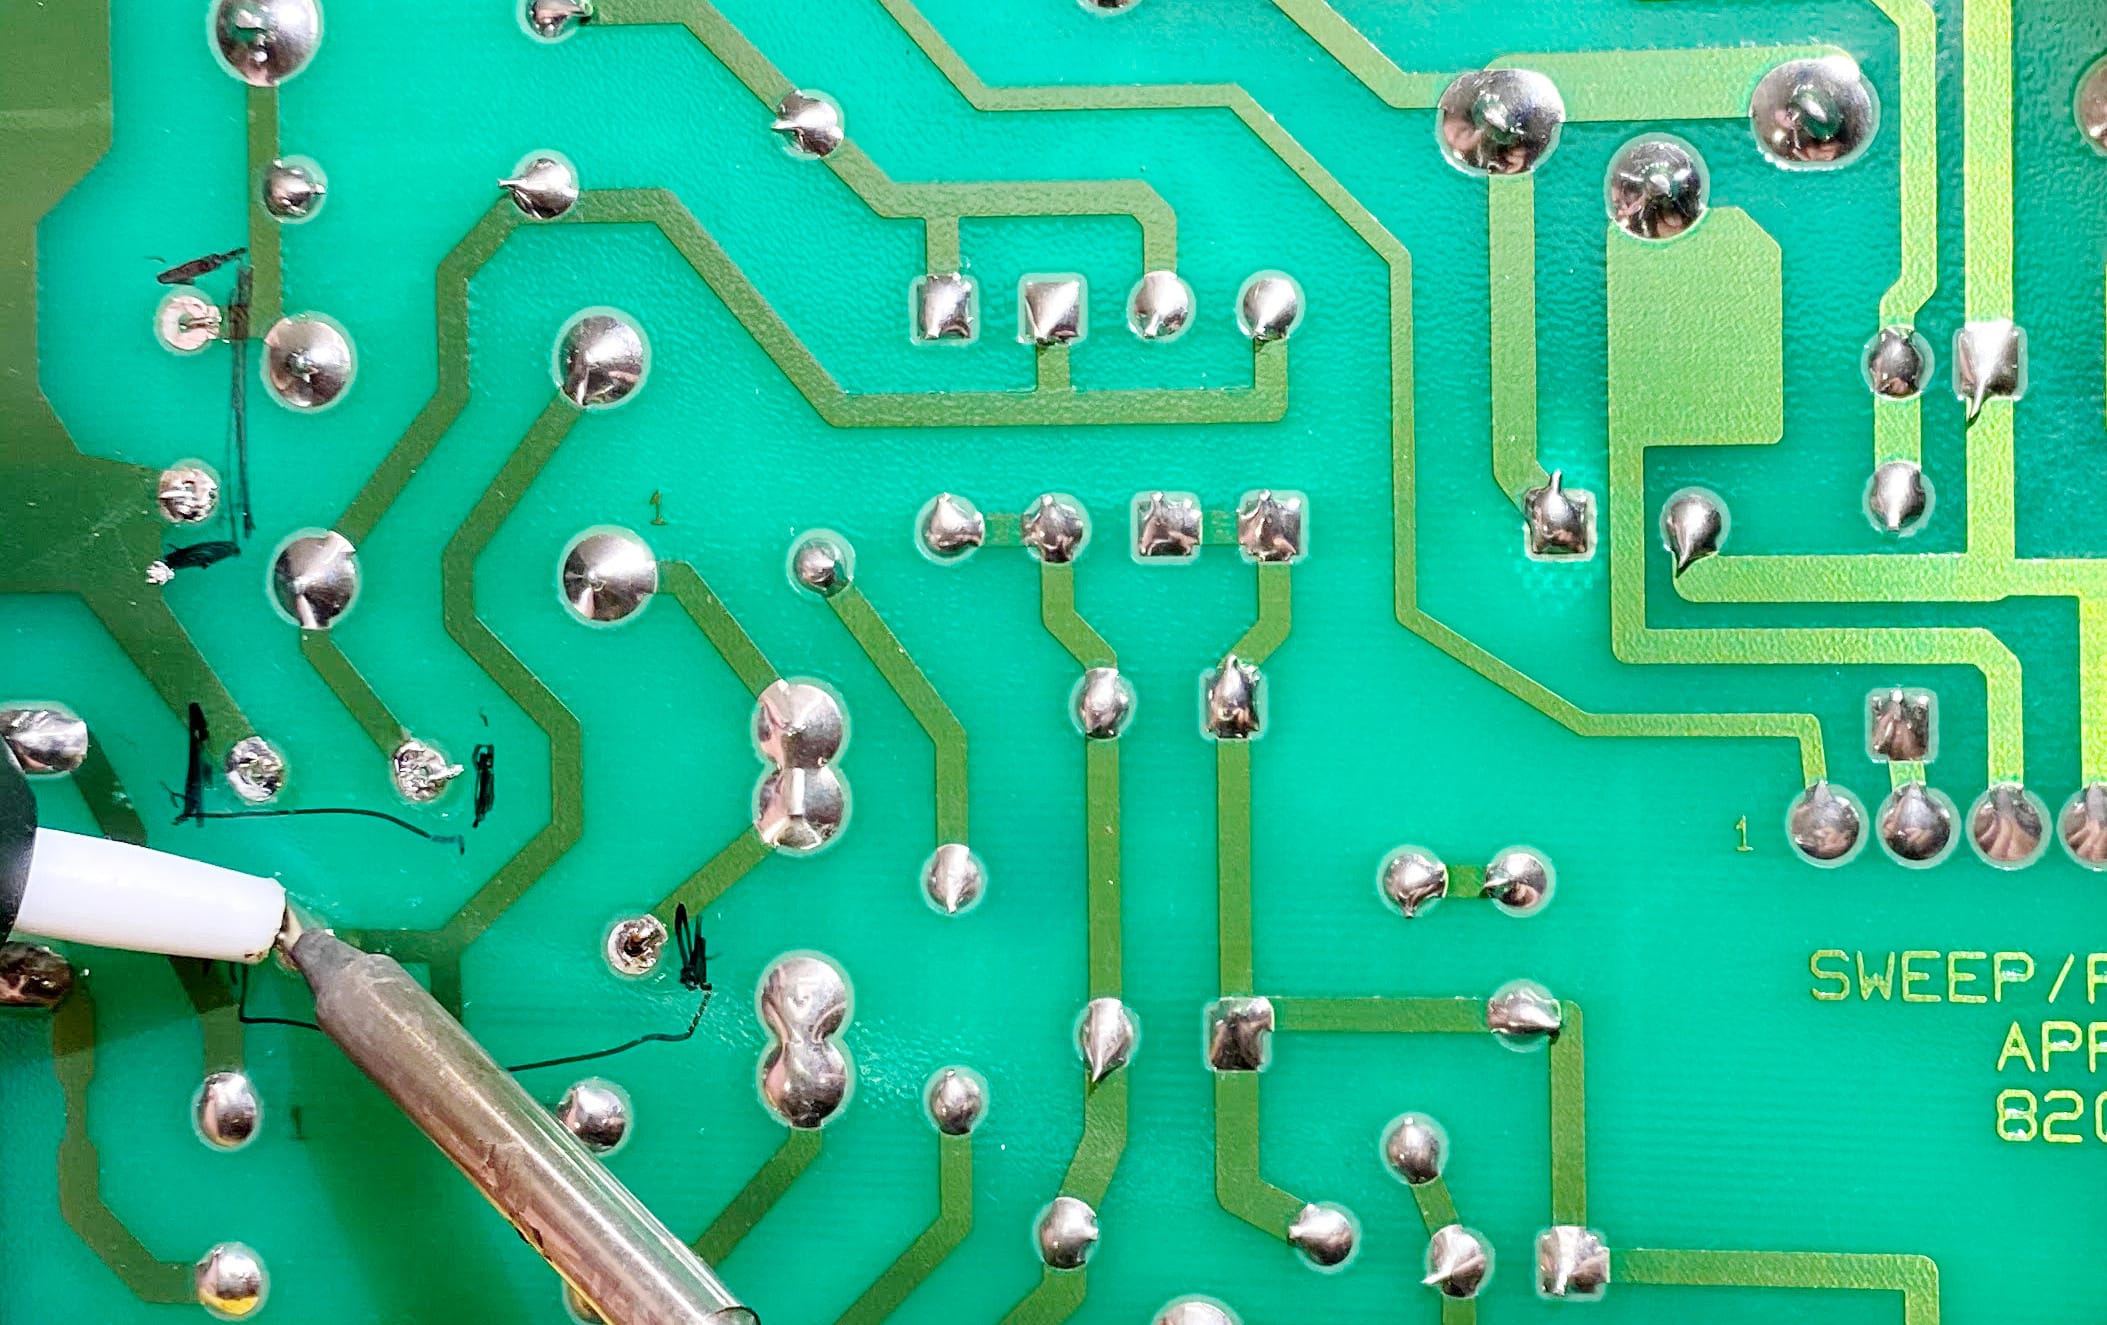
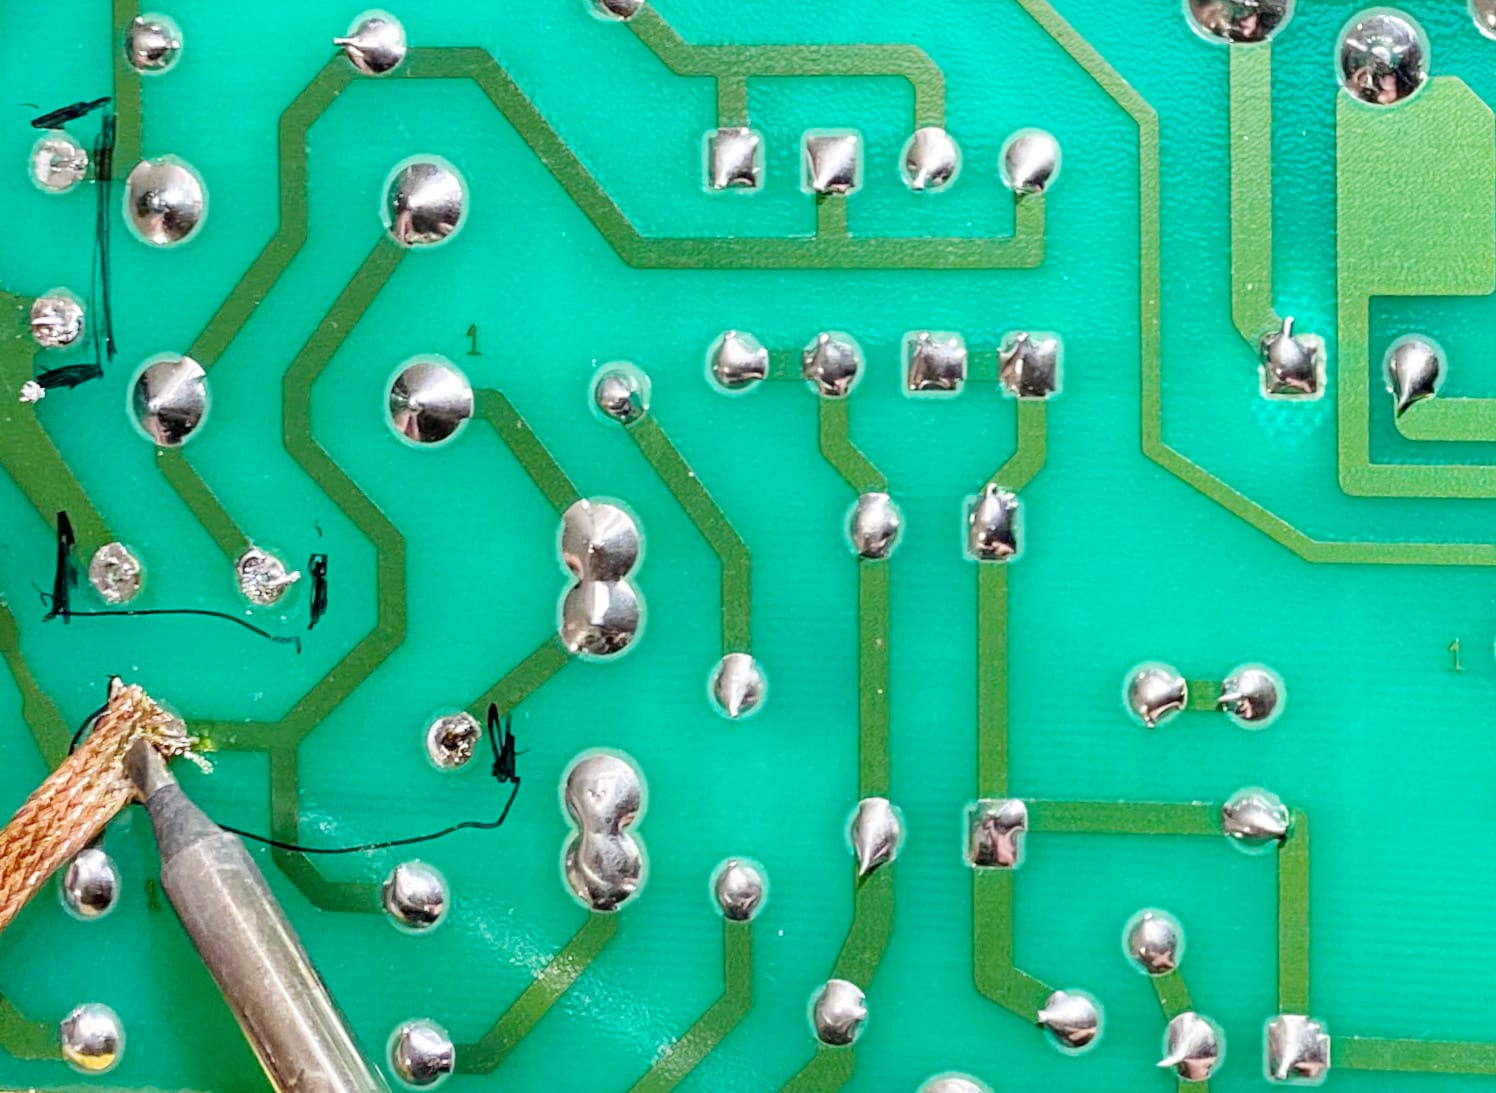
These early Macintosh circuit boards only have screen printing on the top side of the board, making it more difficult to identify the solder pads connected to various components. One trick I use is to shine light through the back of the circuit board and using the shadow from a marker to identify the placement of the component, draw identifying marks on the back of the circuit board itself.
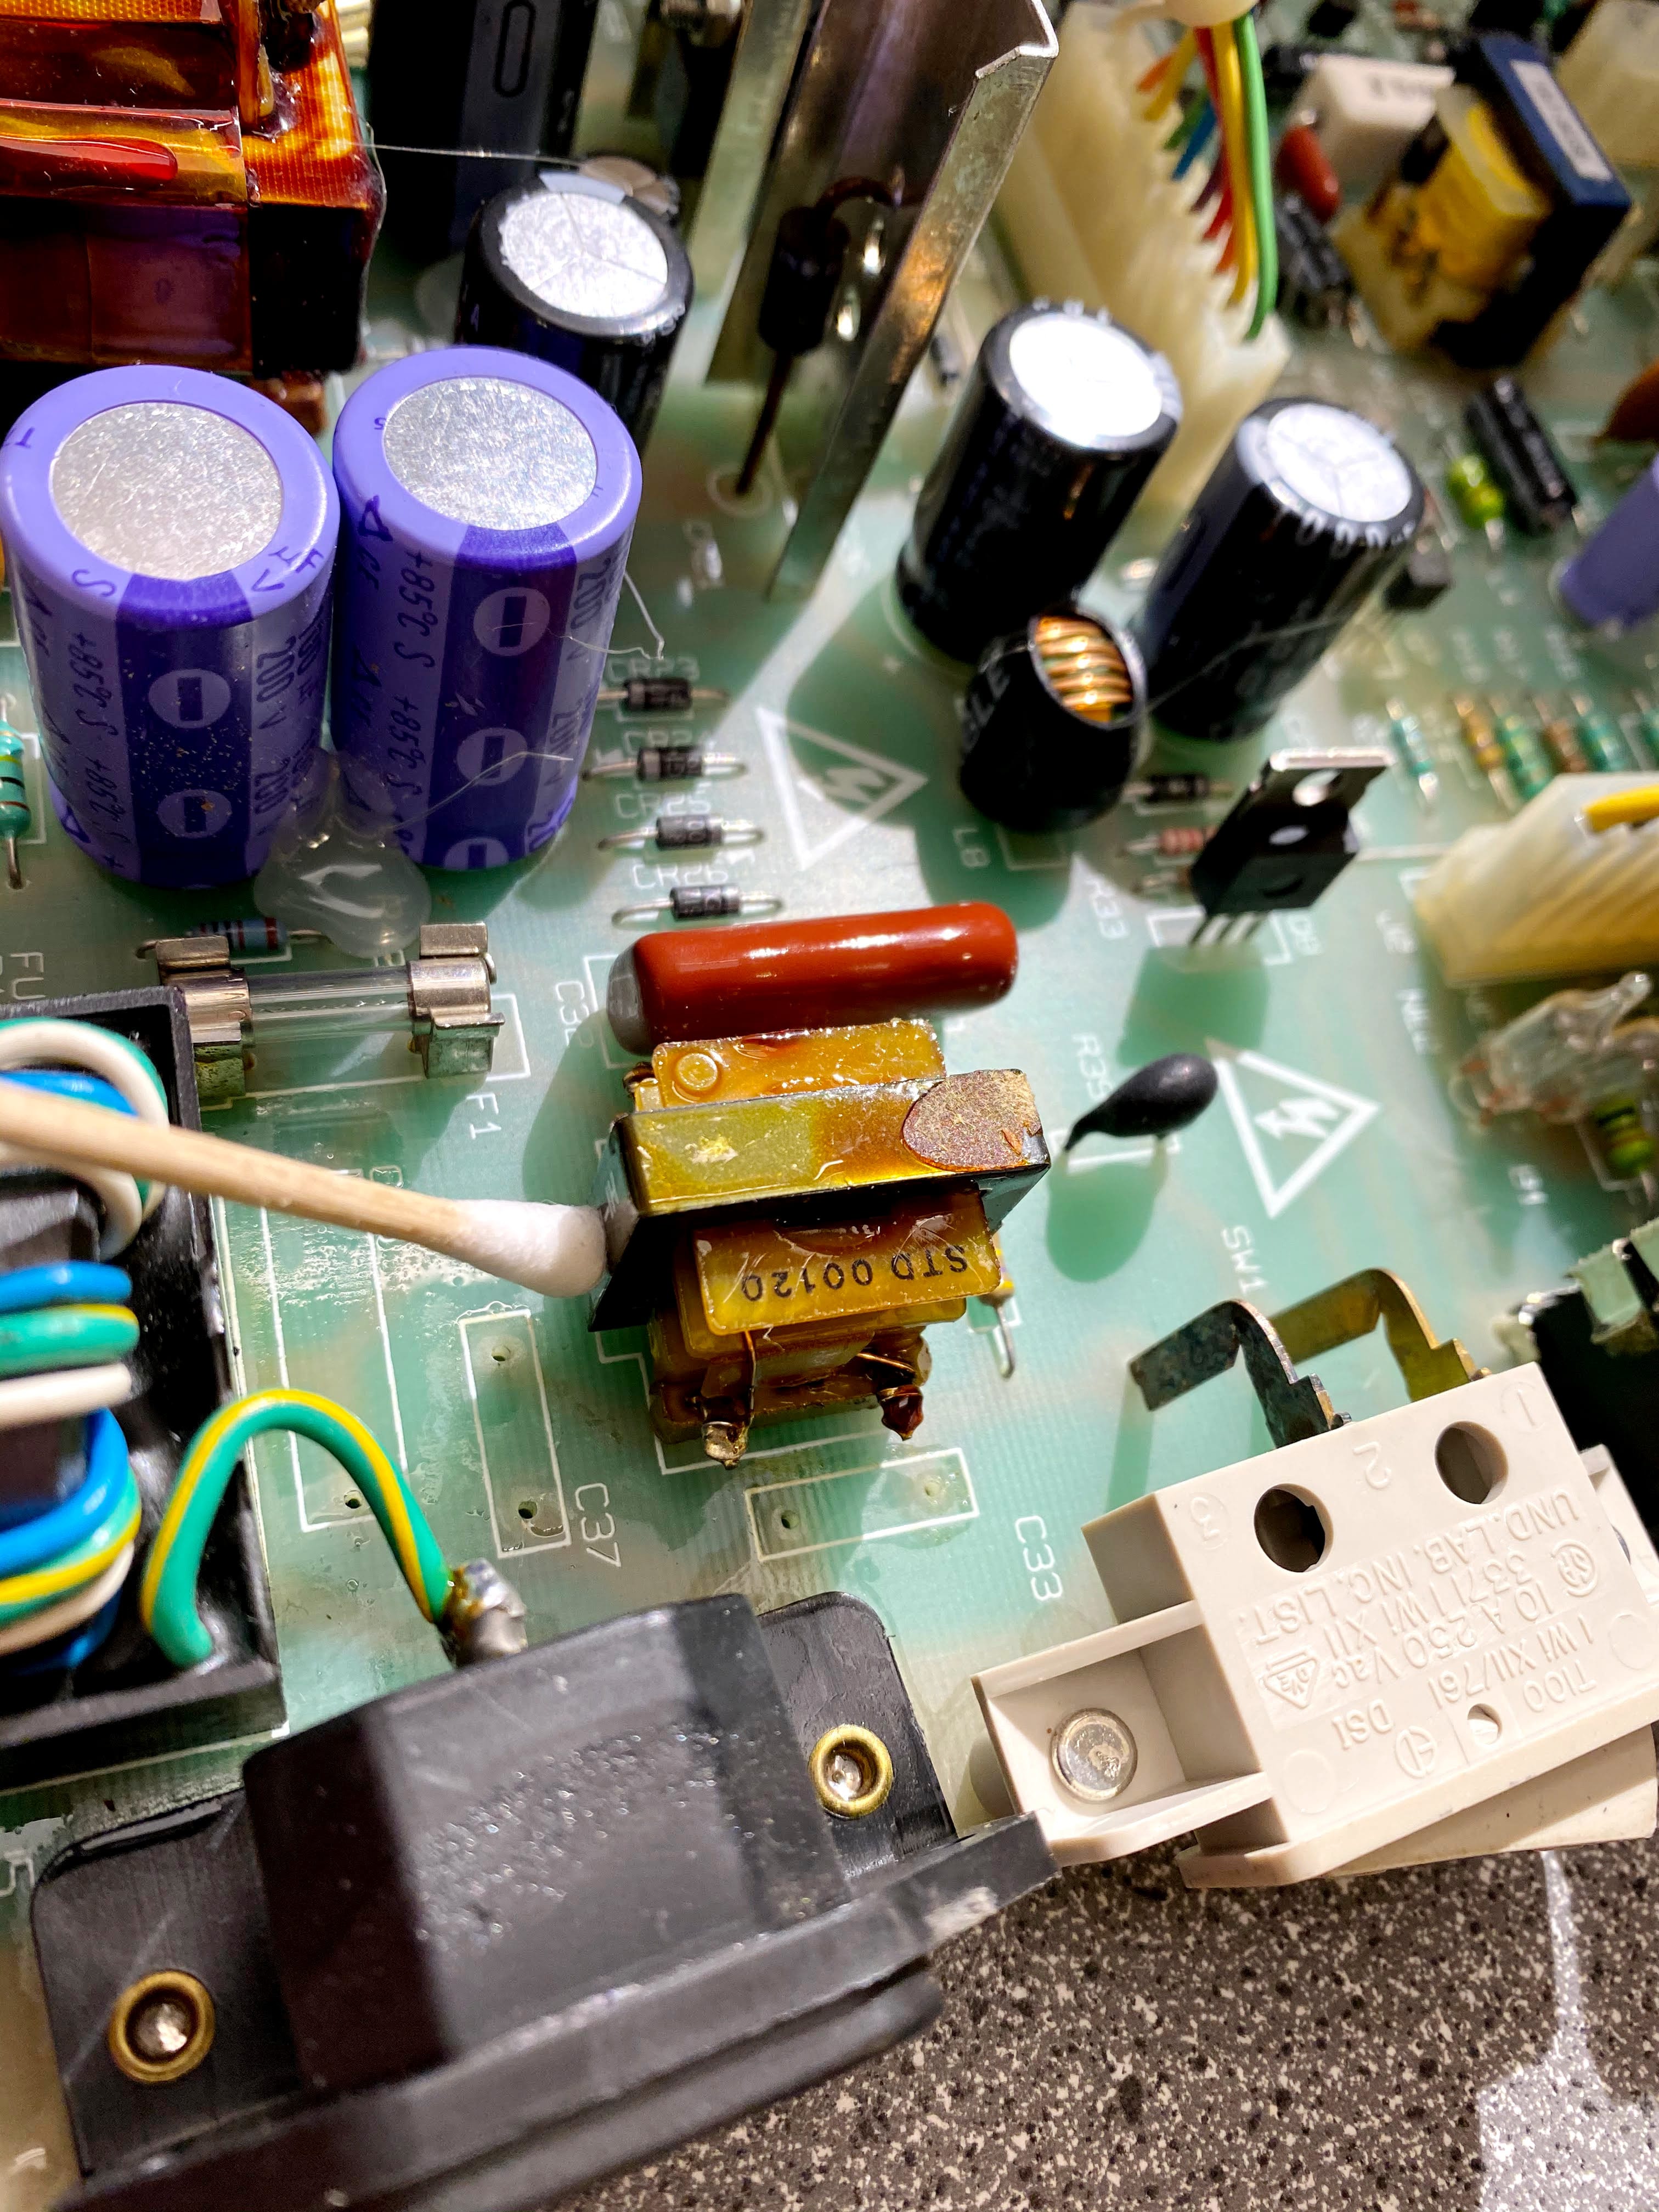
On this Macintosh, I opted to replace all three RIFA film foil capacitors as a precaution. Only the primary 0.1µF capacitor had failed, but the other two Y-class capacitors were original to the machine, of the same type and since I had the computer apart I also wanted to replace the additional RIFA capacitors.
Once you have identified the solder pads for the capacitors you wish to replace, it’s a simple matter of desoldering and removing the capacitor(s). I’ve had good luck with a simple solder sucker followed by solder wick.
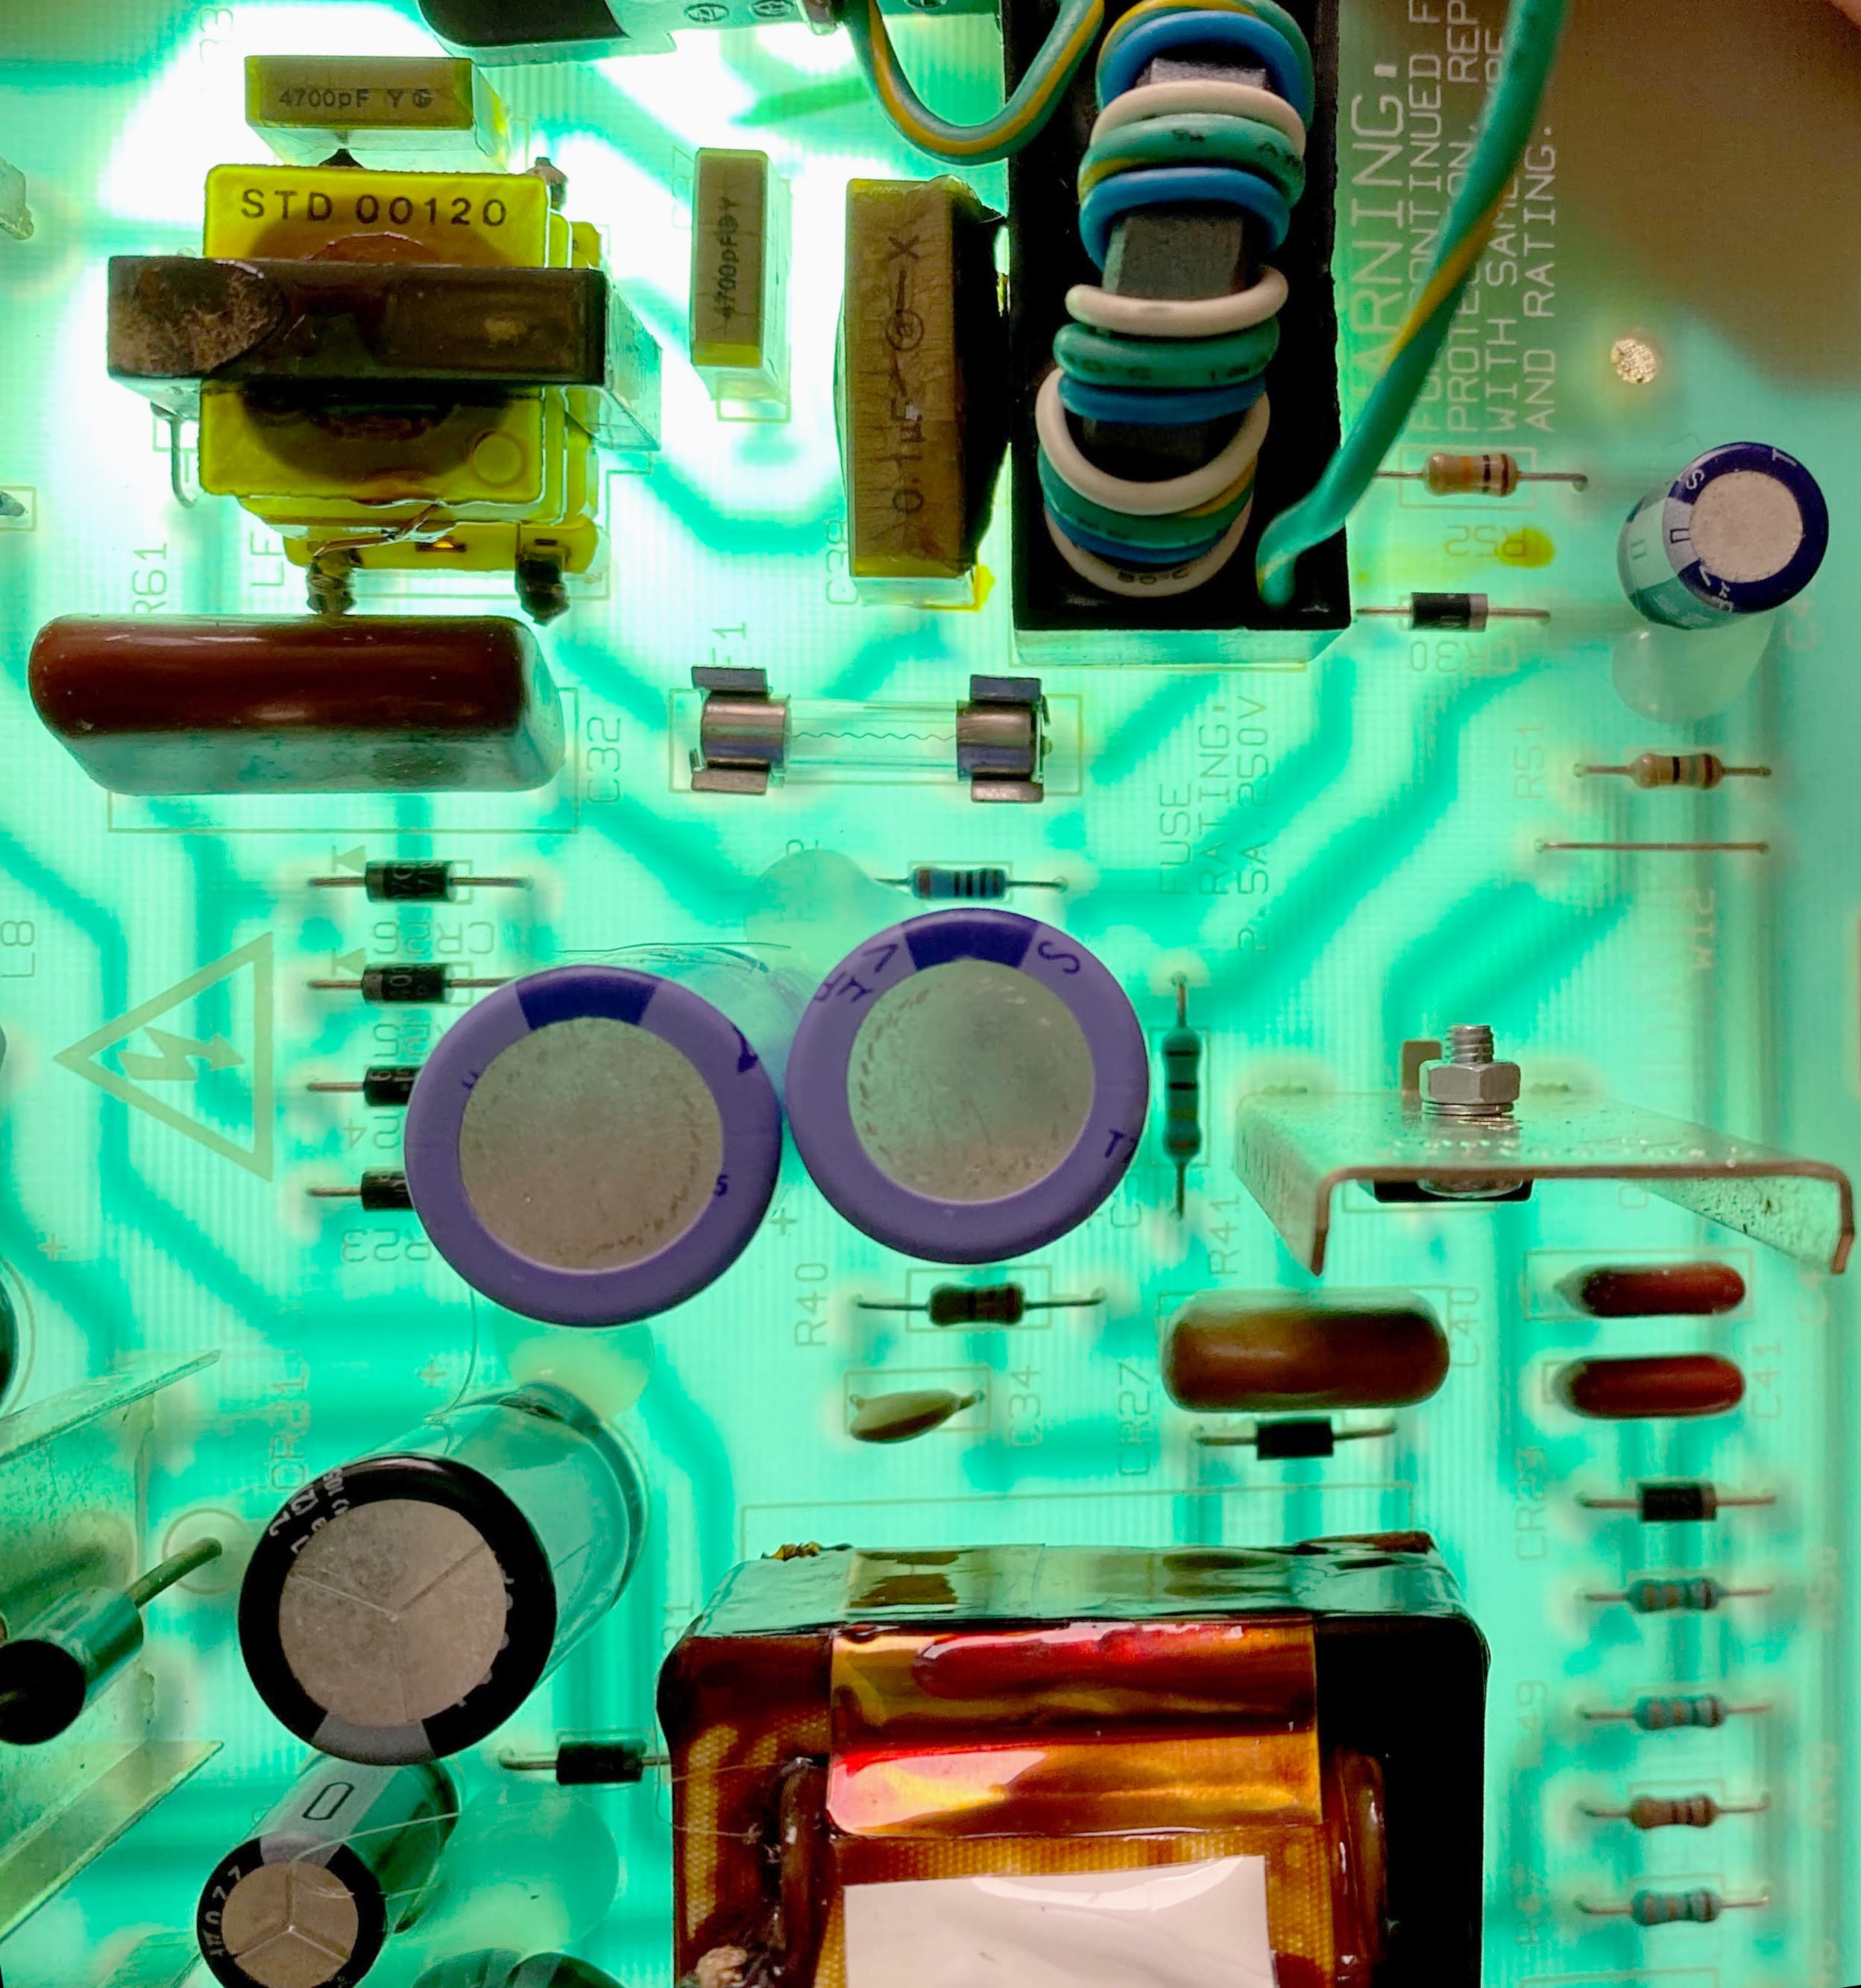
Once you have the capacitor(s) desoldered and removed from the analog board, you must clean the electrolyte which leaked from the bad capacitor. When a capacitor catastrophically fails as mine had, the capacitor tends to discharge it’s electrolyte often onto neighboring components. If you look closely, you can see electrolyte which has leaked under the toroidal noise filter, so ensure you inspect your circuit board thoroughly.
I like to tackle the clean up with some cotton-tipped cleaning swabs soaked in distilled white vinegar. Capacitor electrolyte is a basic fluid and should be neutralized with something on the other end of the PH scale, in this case an acid - vinegar.
Once the electrolyte has been neutralized with the vinegar, cleaned from the circuit board and any other components it reached I perform another round of cleaning with 99.9% Isopropyl Alcohol. I like to use an excess of alcohol in this final stage of cleaning to ensure that I’ve removed all traces of the electrolyte and also all traces of the vinegar.
Reassembly
Installation of your new capacitor is a simple case of placing the capacitor in the circuit board and soldering the leads in place.
Why RIFA?
Why would I be replacing a component notorious for failure, with the exact same brand?
Well, it turns out RIFA brand capacitors are the only X2-class, film foil capacitor which meet the original specifications, and are a drop-in replacement for the original. To be fair to KEMET (the Manufacturer of RIFA capacitors), a 30+ year life cycle is impressive. I am quite sure the original RIFA caps were never intended to provide service for this long, so I’m not terribly worried about reusing RIFA filtering caps.
Once your new capacitor has been installed replace the white protective cover on the back of the analog board. From here you just need to reverse the order of the disassembly, ensuring that all connections have been remade and are correct.
Smoke Testing
Once the case has been reinstalled, it’s now time to test. Connect your Macintosh to mains power, look and listen for anything out of the ordinary. If you see, smell or hear something abnormal, quickly disconnect the power and investigate. Assuming all is well, proceed to power on the Macintosh. You should hear the familiar startup chime, see a Happy Mac icon and a have a Macintosh computer with a new lease on life.
Why Do RIFA Capacitors Fail?
The surface mount capacitors that most often fail in vintage computers are film foil style, AC line filtering capacitors. Their primary purpose is to “minimize the generation of Electromagnetic Interference and the negative effects associated with received radio-frequency interference. In order for these capacitors to perform their EMI/RFI filtering tasks, they are directly connected to the AC power input, that is, the AC “line” and the AC “neutral”. Because of this direct connection to the AC voltage, the capacitors may be subjected to overvoltages and/or voltage transients—lightning strikes, power surges.” 1
The capacitors we’re dealing with here are at least 36 years old, and likely with many years of active service. These capacitors are energized and in use any time the computer is plugged into mains power, even if the computer itself is shutdown.
Aside from the possibility of overvoltage, voltage transient events and age there is likely another cause for this capacitor failure:
The presence of humidity in the capacitor, because of poor drying during the manufacturing process, or because the moisture permeability of the material was too high, or because the humidity level where the capacitors are installed was too high, may lead to three failure modes…
…The third failure mode is a reduction of the insulation resistance, which is the parallel resistance of the capacitor. A decrease in insulation resistance leads to an increase in current leakage from one electrode to the other…
Humidity is a concern for capacitors contained in plastic because moisture can permeate through this type of material. Once inside the capacitor, the moisture has several effects: first, it decreases the electrical strength of the gas in the case of oil-free capacitors, leading to corona demetallization of the electrode, and secondly it corrodes the electrode. When moisture is present in the dielectric film, the loss factor is increased, because of the presence of water dipoles, and the insulation resistance is reduced, leading to current leakage and generation of heat.
[This] failure mode may have a runaway behaviour. The more the insulation resistance decreases, the more heat is produced, and the more the temperature increases, which leads to a new insulation decrease. This phenomenon may end with the appearance of chimneys and melting of the dielectric.
Source: Gallay Garmanage, R. (2016). Metallized film capacitor lifetime evaluation and failure
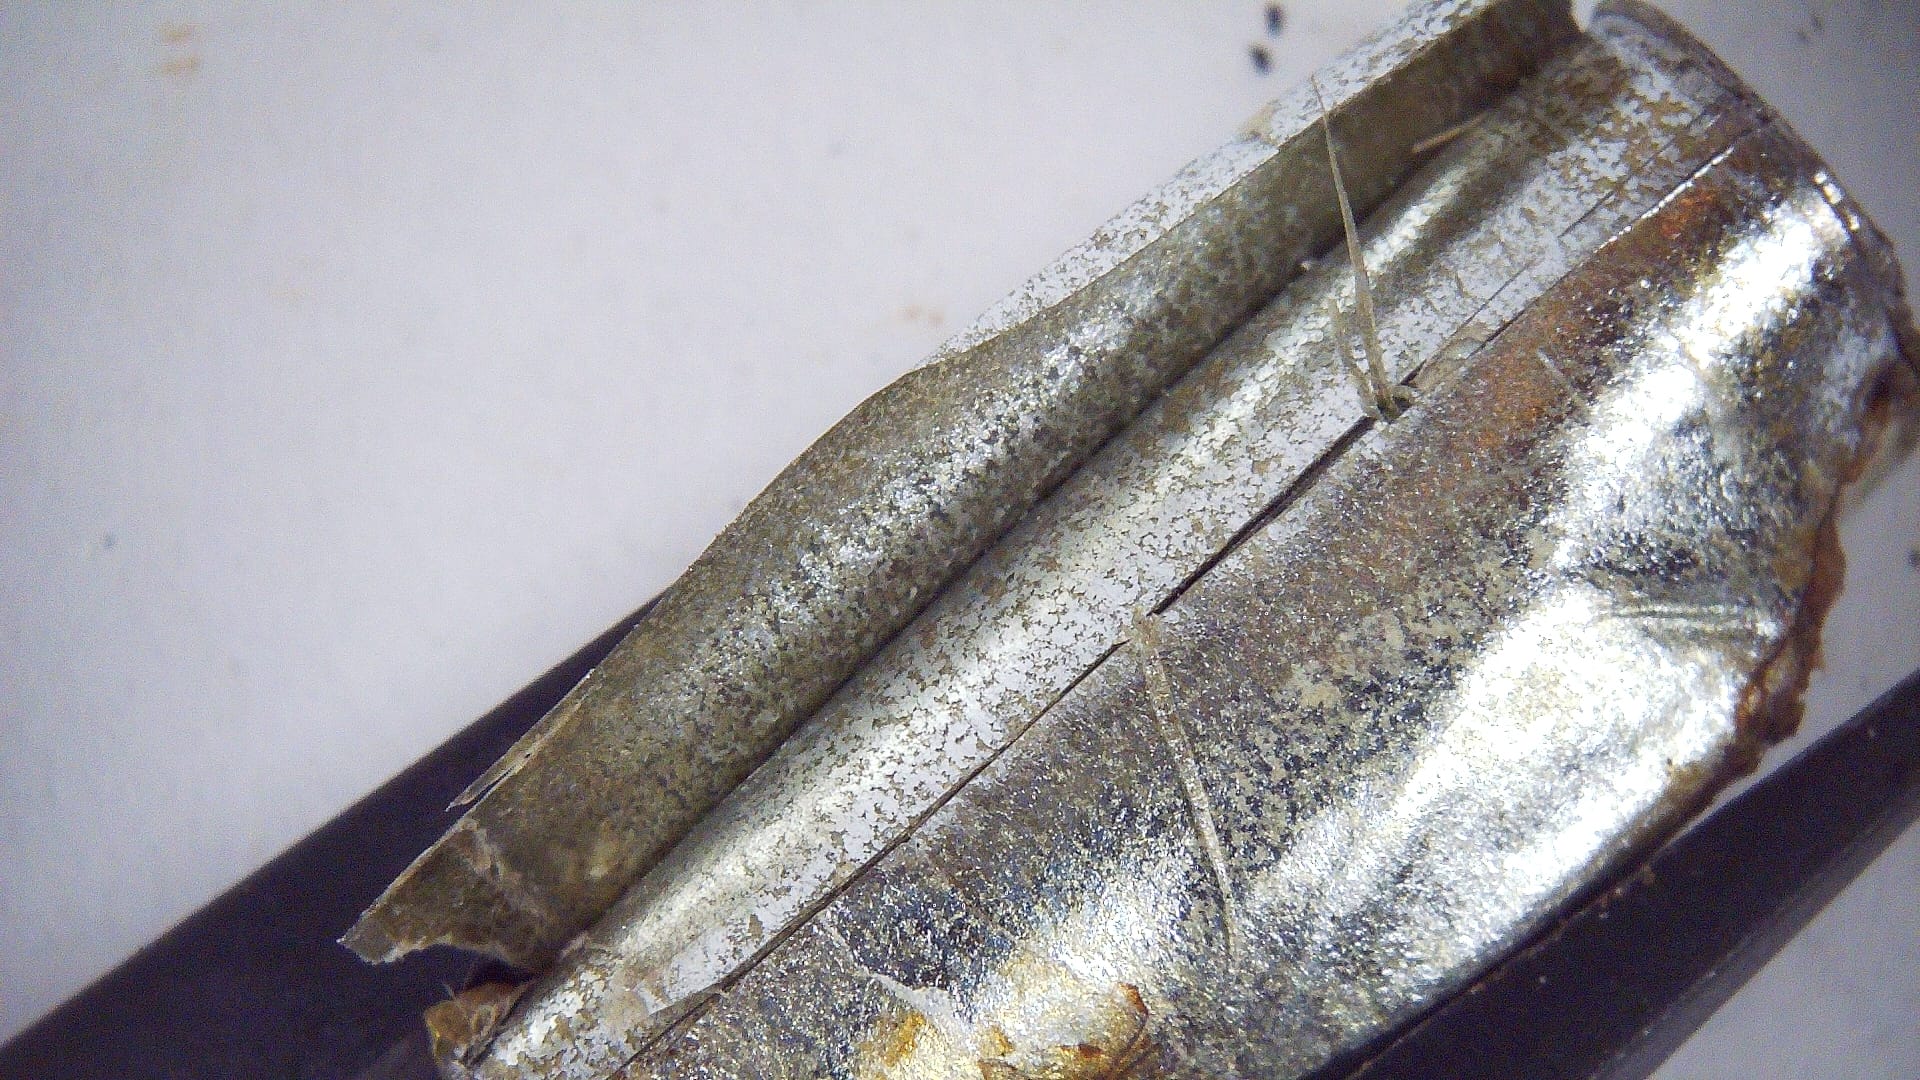
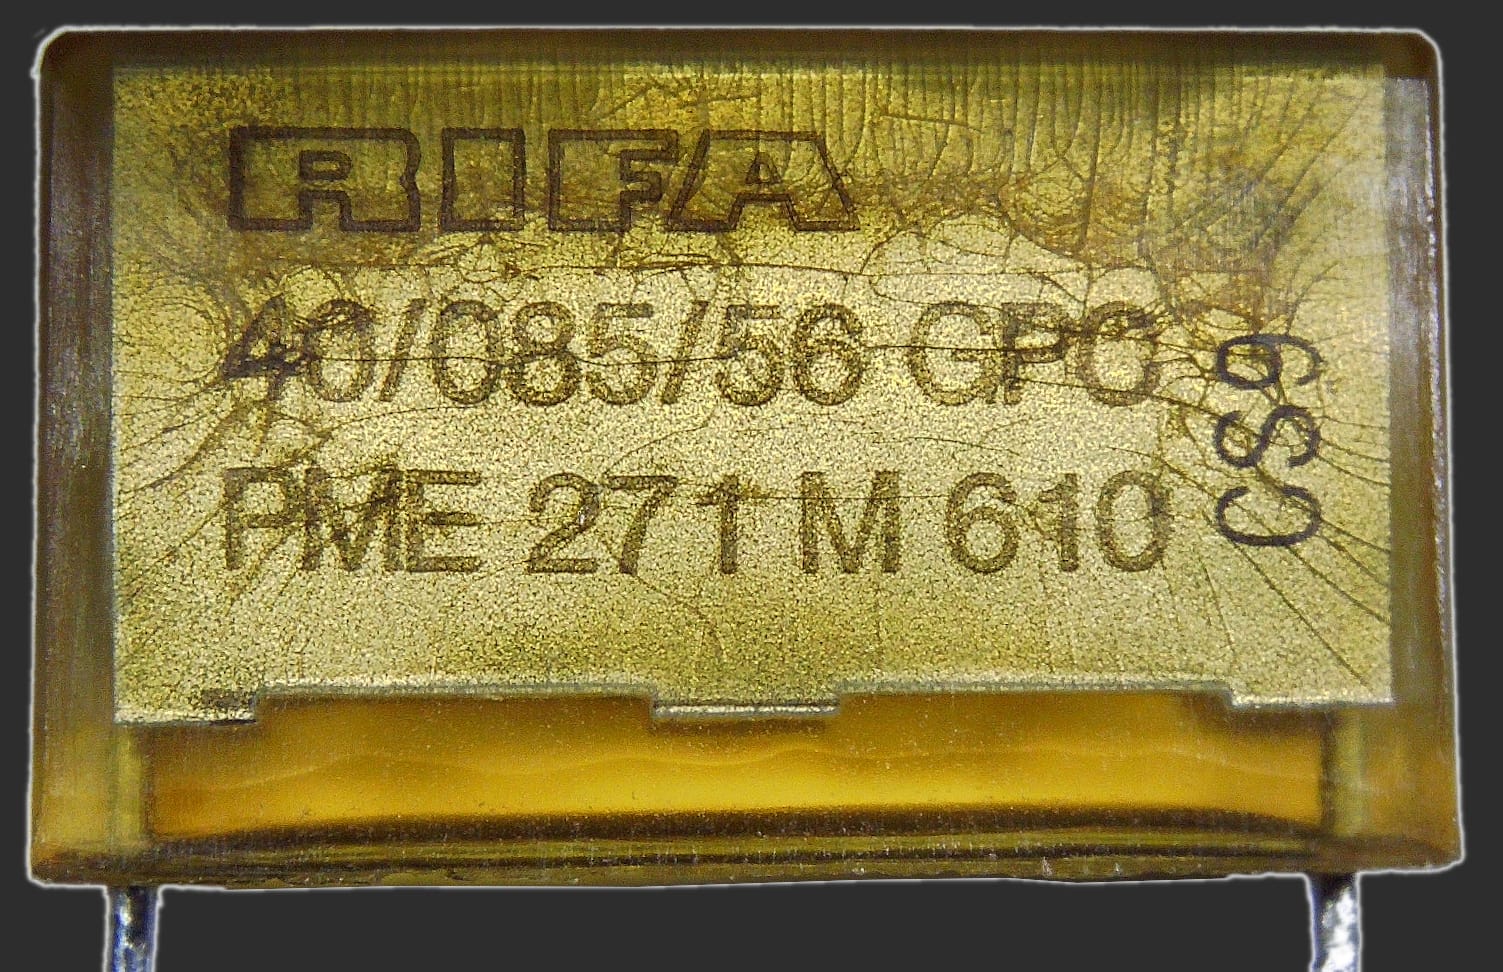
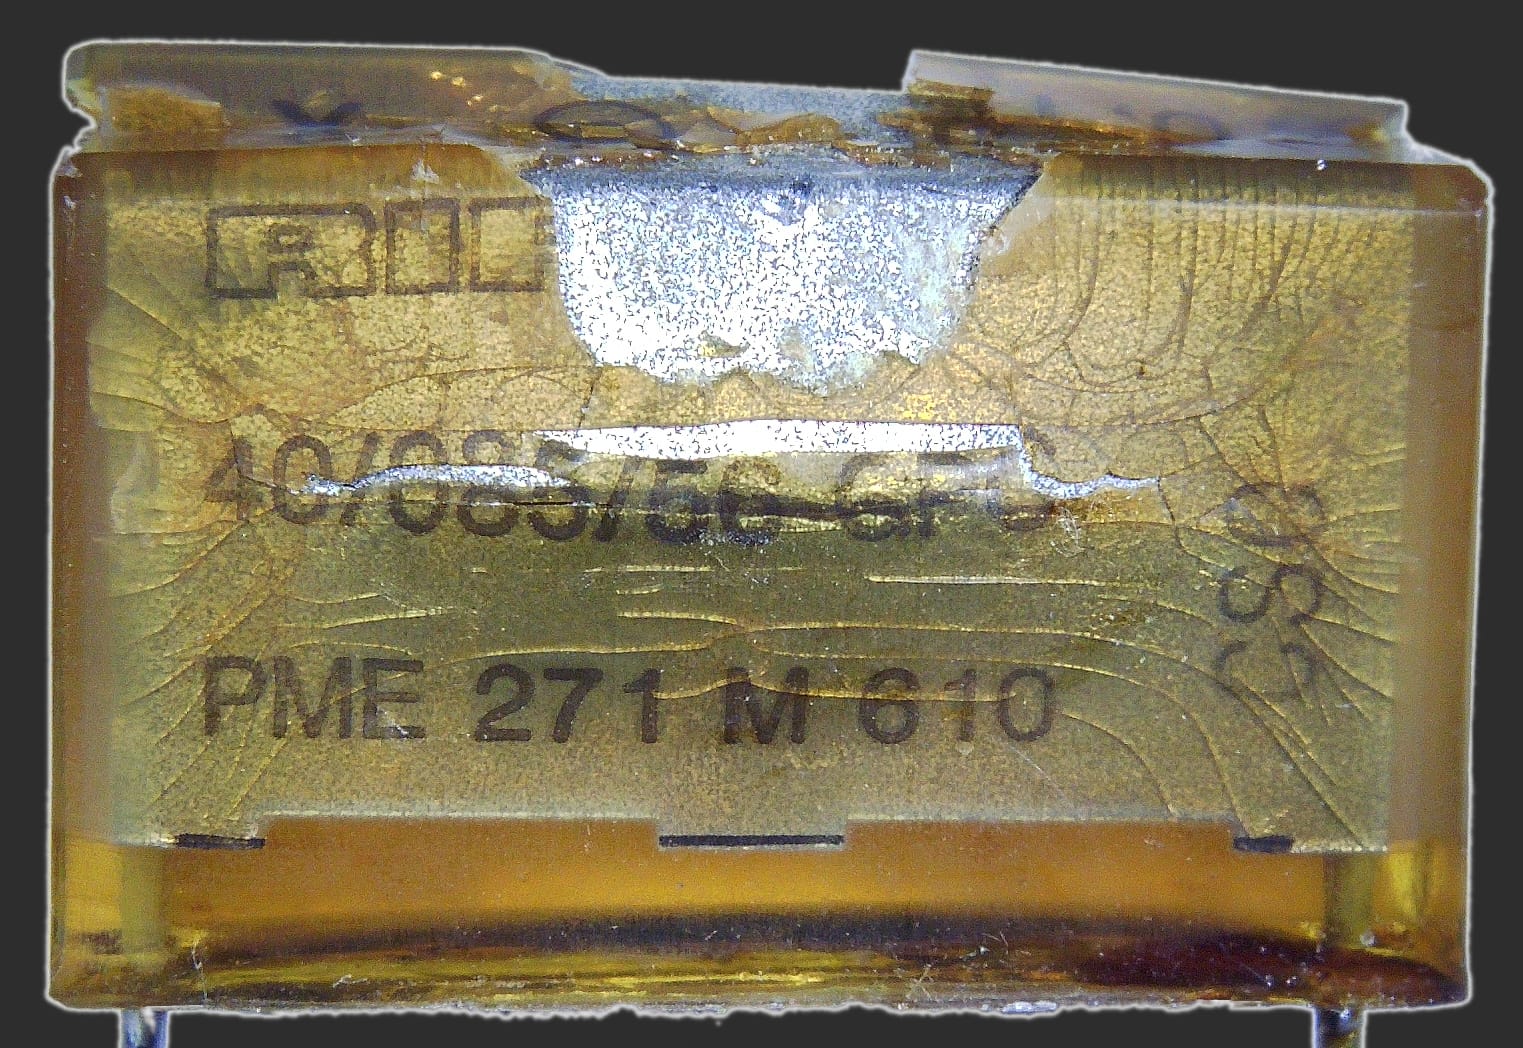
Looking at a vintage, but still functioning RIFA filtering capacitor, you can clearly see many hairline cracks throughout the plastic enclosure. It's not hard to imagine moisture from the air permeating both this enclosure and the dielectric film within, eventually leading to a failure condition as described in the research paper quoted above.
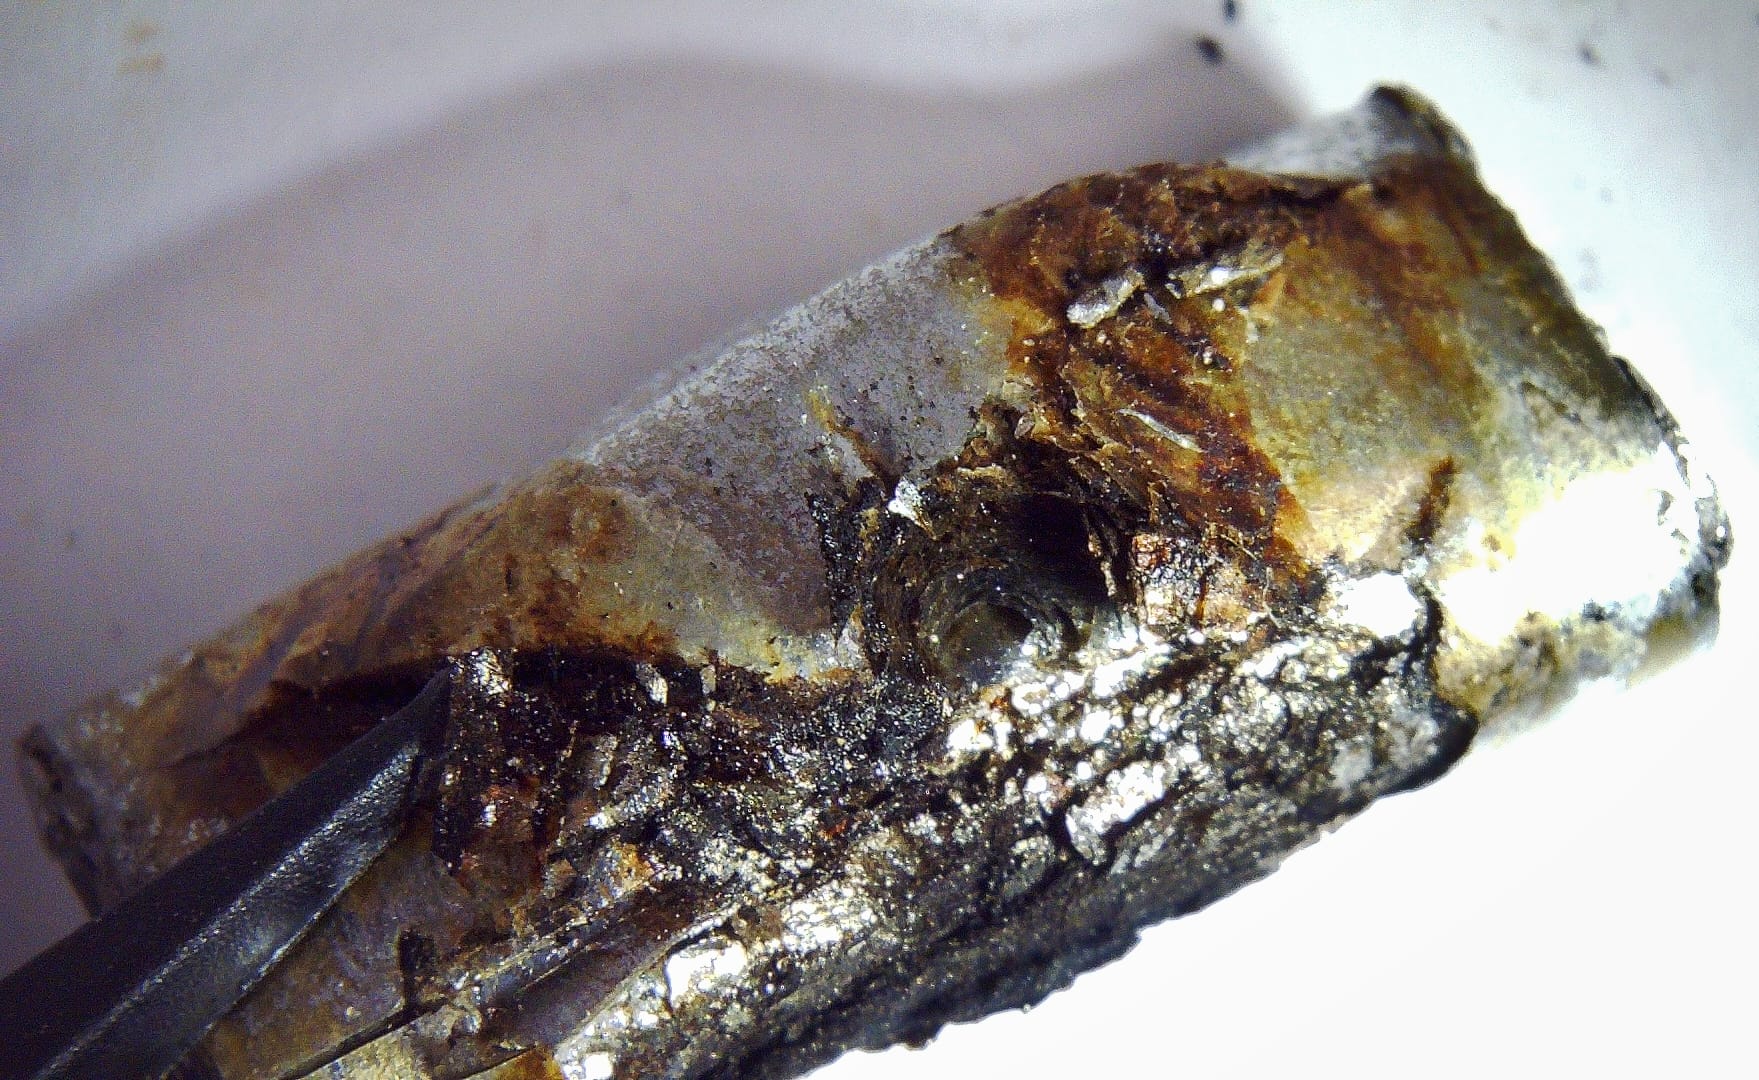
Looking at a similar RIFA capacitor which has failed, you can see how catastrophic this failure was:
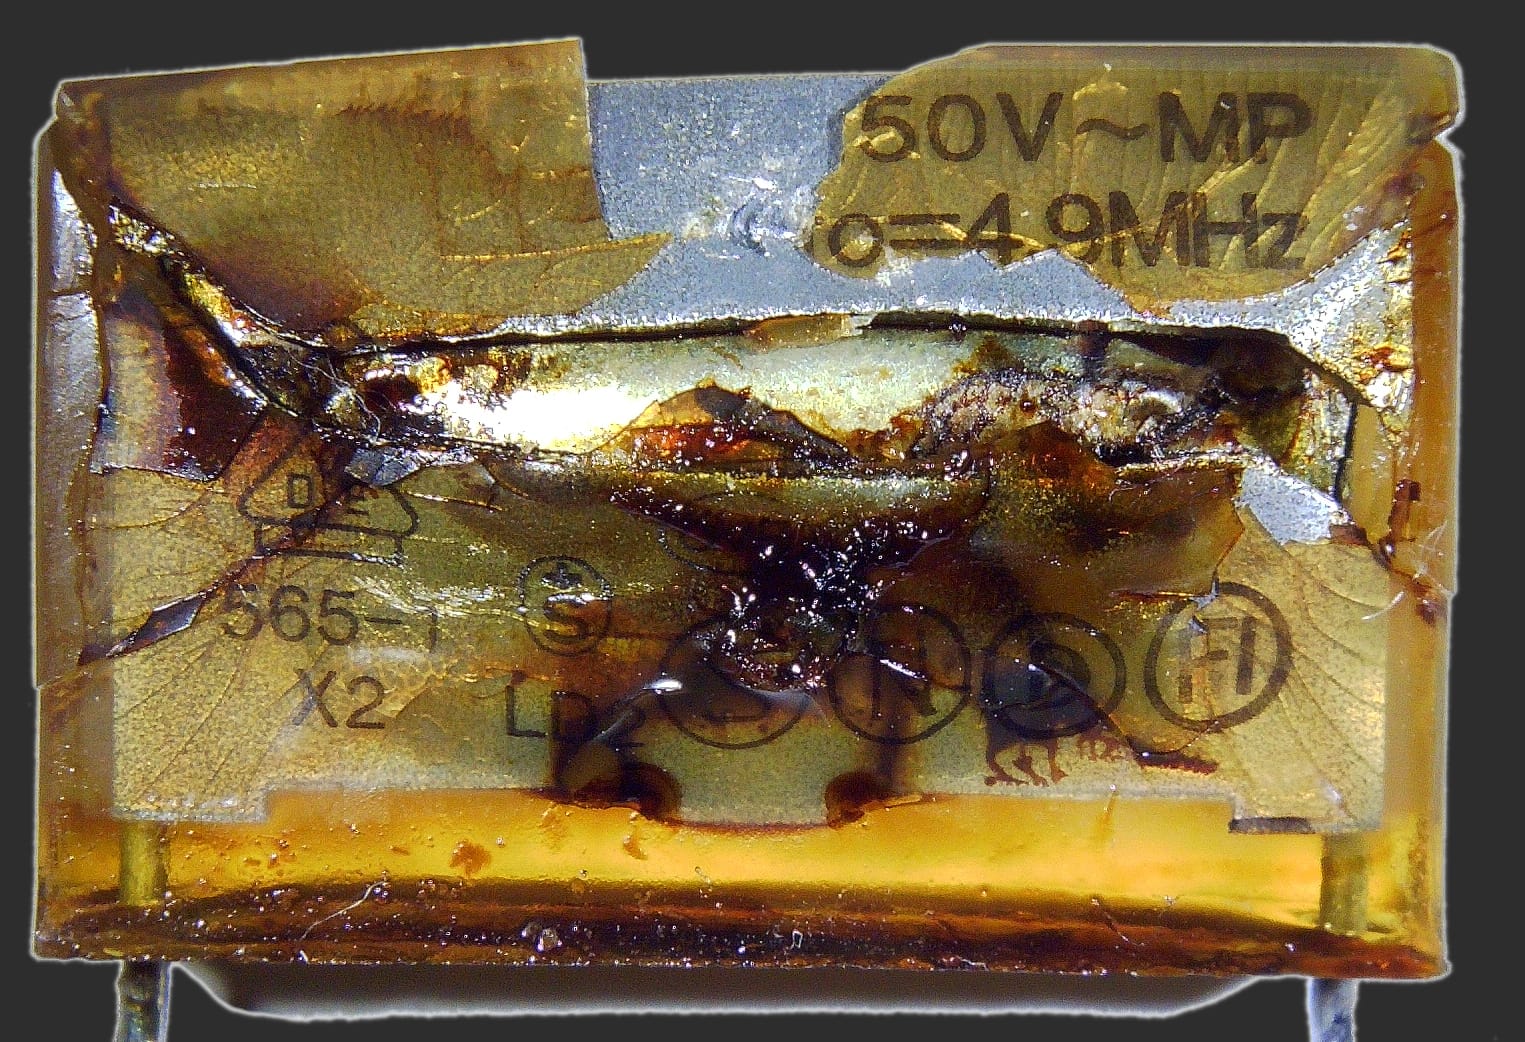
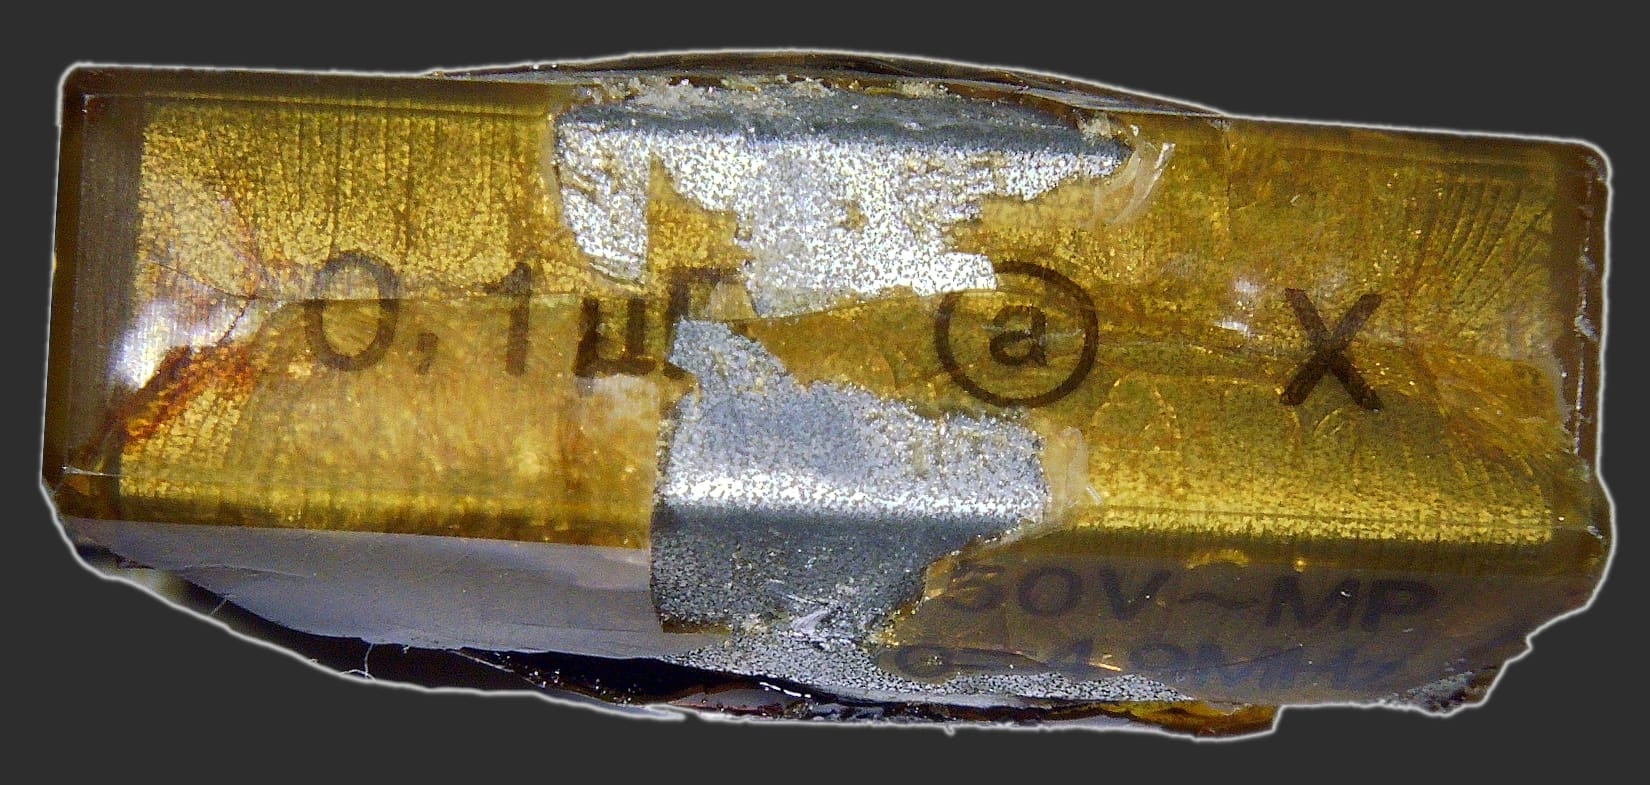
One interesting finding is the presence of metal foil just under the plastic enclosure which you can clearly see in the failed capacitor. I expect it’s unlikely(?) that moisture would permeate this metal foil, so why do these capacitors fail? I unfortunately don’t have a concrete answer.
In disassembling the failed capacitor, it’s very clear this was a catastrophic failure. My best guess, as stated in the paper quoted above is the capacitor’s insulation resistance was reduced leading to current leakage and generation of heat. This in turn leads to a runaway overheating process and eventually complete failure and destruction.
This cycle of overheating resulted in a pressure increase within the plastic enclosed capacitor which eventually burst, releasing the electrolyte and generated gasses from this runaway overheating failure.
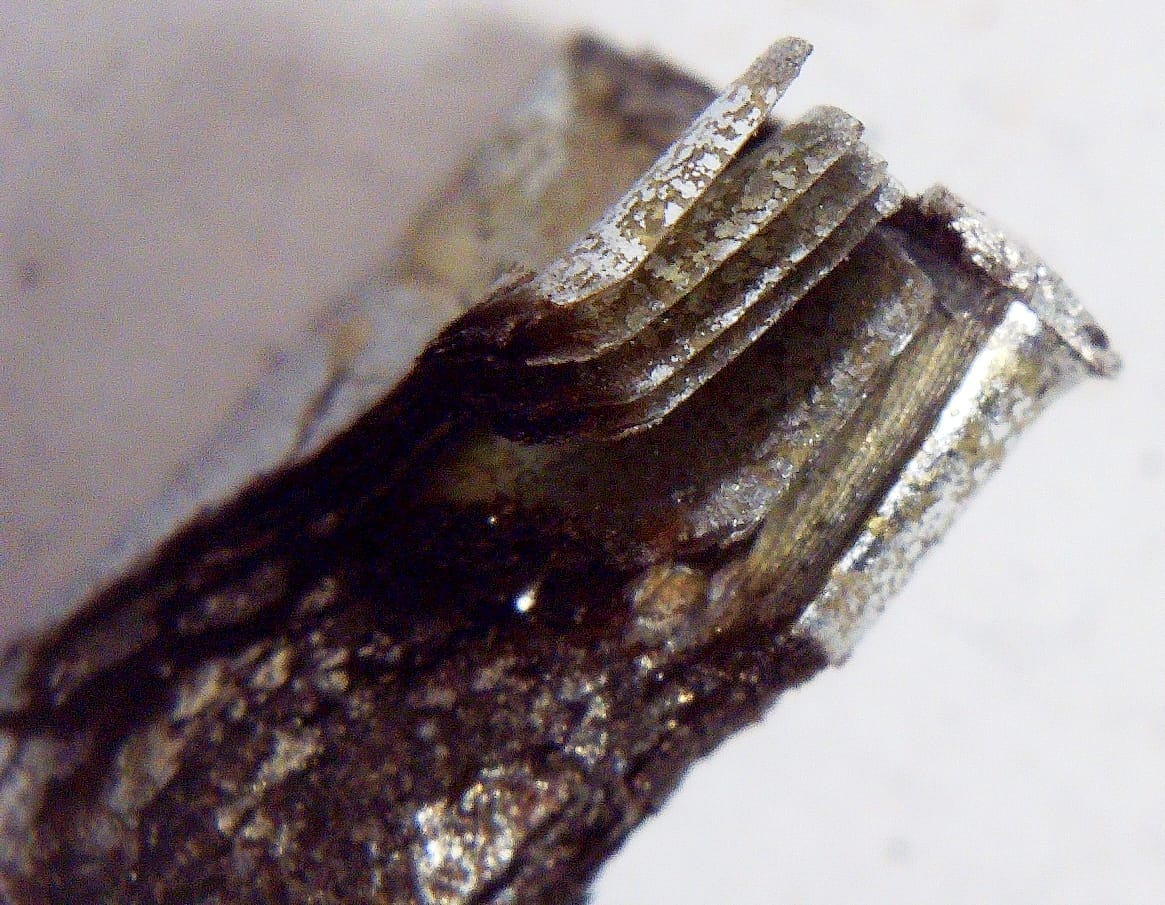
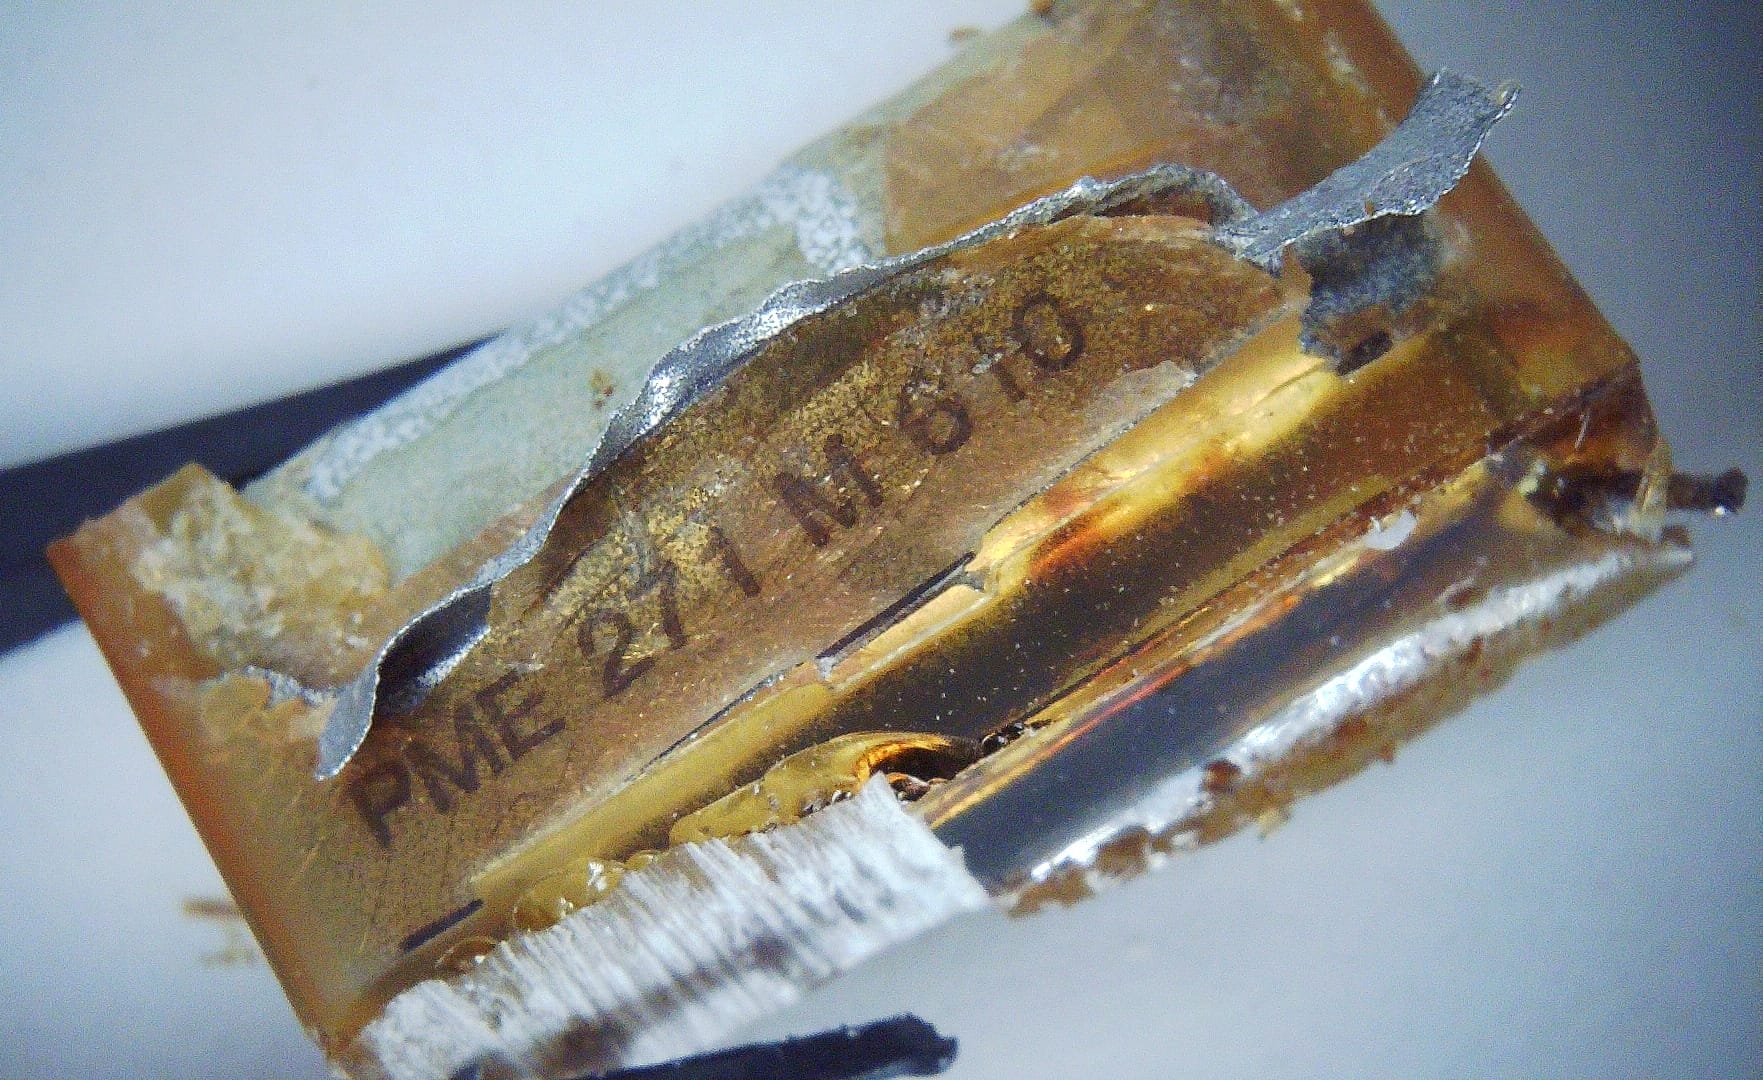
This was an interesting investigation, which ultimately led to a semi-informed speculation into the cause(s) of how this capacitor failed. I also took this opportunity to completely disassemble and photograph the components which make up a 1980s film foil capacitor … for science :)